
Support Center.
Get Started or Become a Pro. Browse our support articles to learn how to get the best out of PeopleGoal.
How to Create an Employee Asset Tracking process
For many of us, we fail to achieve even the simple task of keeping track of our phone, wallet and any other possessions. That chilling sensation that courses through your body when something you need isn't exactly where it's supposed to be, is something no one would ever choose to experience. An antidote to this may well be impeccable organizational skills, however, not even the most well-organized individual can prepare for the intervention of another person. Someone who may, unbeknownst to them, pick up an item and leave it elsewhere, in their own search for whatever they can't find can inadvertenly cause havoc for another individual.
Whilst it may seem that this frustrating cycle of finding and losing things is never-ending, there is a solution. At PeopleGoal we have created an asset tracking app that allows for all employees to update and maintain a constant inventory of all of your company assets in real-time. Using an asset tracking system is a great solution for any organization. By shifting the responsibility from the employees to a centralized electronic system you can expect to have considerably fewer issues with tracking assets and your inventory management would no longer be prone to the unpredictability of human error.
Asset tracking provides valuable insights into the performance of your organization's physical spaces and materials. Developing a greater appreciation for the use of inventory tracking will have significant benefits in identifying and conceptualizing important factors that can enable you to harness much more streamlined and efficient business operations. In other words, asset tracking can provide you with terrific insights that will allow you to get the most out of your organization.
An analysis of your organization's asset utilization can contribute to other benefits. For example, through the use of such software, you can expect to make significant cost savings. Items suspected to be lost can be more easily traced and therefore discovered. Additionally, by monitoring the rate of use of particular items or machinery, you can optimize your organization's budget. With an asset tracking system in place, you are more able to establish the most crucial items of stock in contrast to the least important or even unnecessary equipment. This also applies to equipment maintenance too, ensuring that employees are safe when conducting operations with particular tools.
If you would like to improve the electronic structure of your asset tracking system with PeopleGoal then take a look through this guide to learn more about how you can set up an employee asset tracking process with our pre-built app.
Following the steps below, install and launch an employee asset tracking process in a matter of minutes:
1. Install your Asset Tracking app
2. Customize the app template (optional)
3. Configure the app states (optional)
4. Manage your app participants and permissions
6. Launch your Asset Tracking app!
1. Install the Asset Tracking App
- Open up any workspace, click Create a new app, then select Store template.
- Select the Asset Tracking app and click Add this to your account.
- Select the workspace (and workspace folder) you want this app to belong to from the drop-down menu, then click Install template.
We'll take a few seconds to add this to your account, and you'll be taken straight to the app to get started.
All of the pre-built tracking form questions and states are installed and ready to go. You can use the app right out of the box! To skip the customization, head on down to step 4 and set up your app participants and permissions.
2. Customize the Asset Tracking App Template
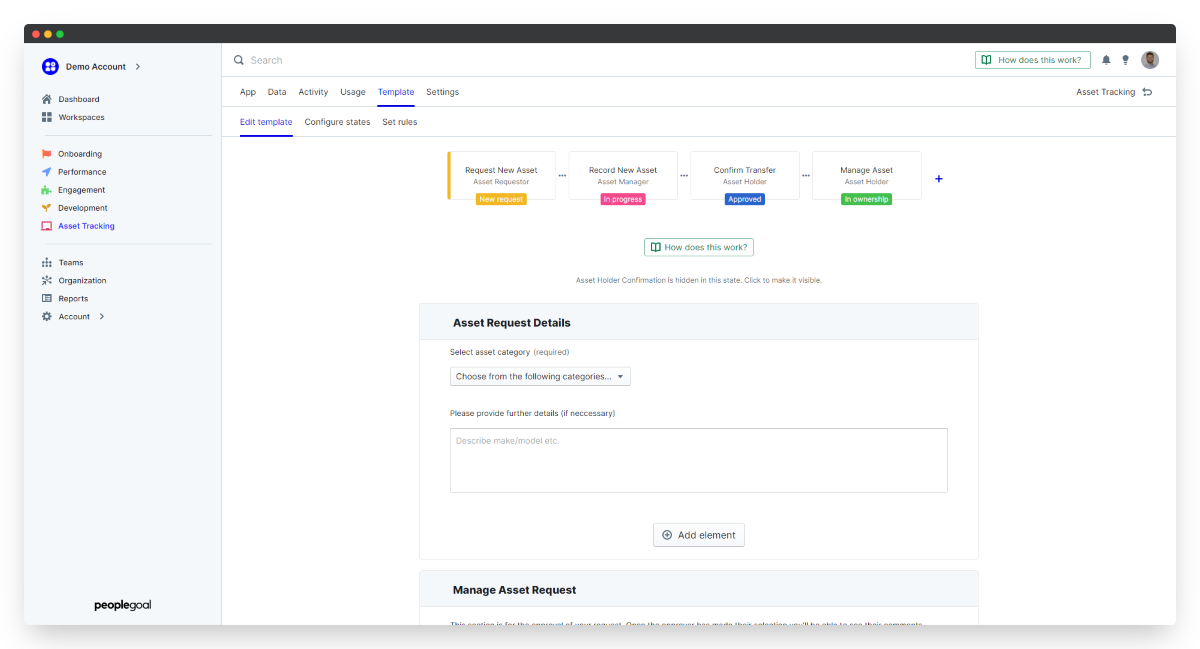
If you would like to configure the asset tracking form to add your own questions and states, click the Template menu, then Edit template.
i. Edit existing elements
Elements are your individual form fields that make up your tracking form. Whether they're text questions, drop-down menus, display-only fields or numerical calculations, every element can be changed to suit your custom process.
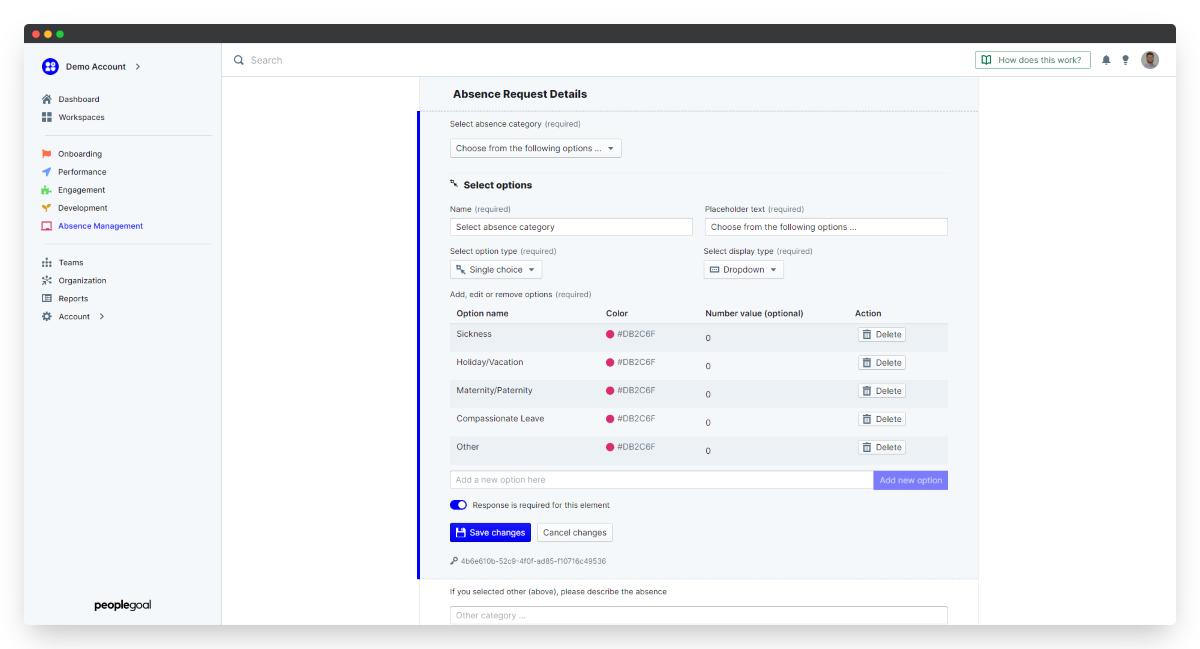
- To change a field, hover over the right-hand side of the element and click the three dots that appear.
- Select Edit element (your element will have a name like "Select", "Description", "text area", etc.). The element editor will open up.
- Change any fields you need to and click Save changes to update.
You should note that each element is unique, so if for example you change the rating set on one element you'll need to change any other questions to match this. Don't worry, it's quick and easy to duplicate an element once you're happy with its setup.
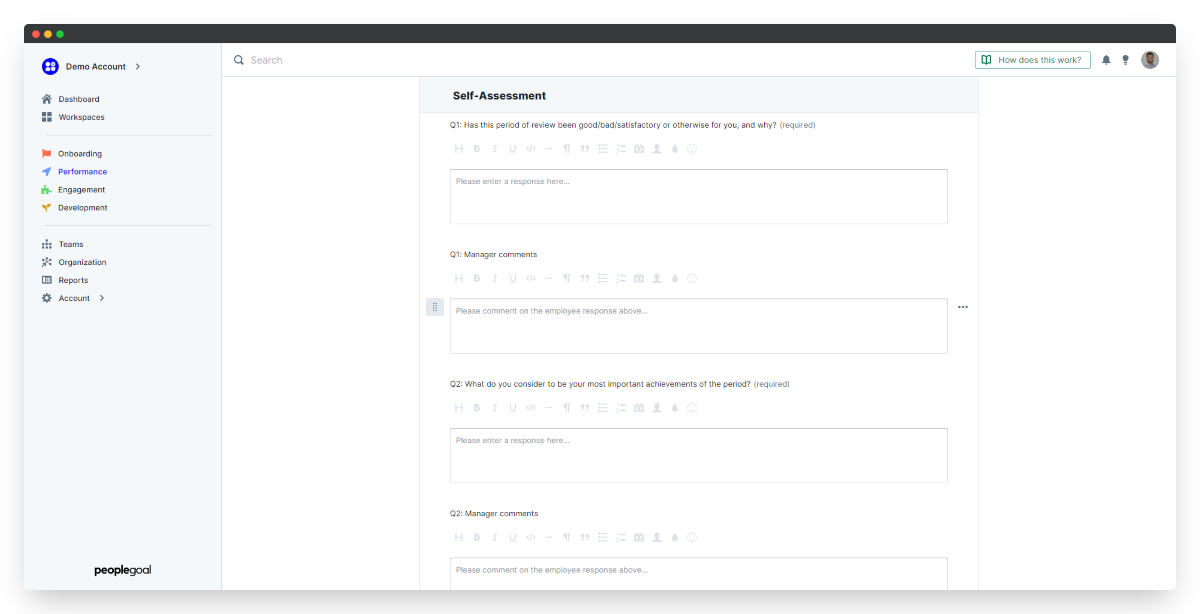
ii. Duplicate elements
- Hover over the right-hand side of the element and click the three dots that appear.
- Select Duplicate element and an exact copy will be created below.
- Edit the duplicated element to change your question text.
iii. Reorder elements and sections
Reordering is super easy - you just click and drag to change the element or section order.
- Hover over the left-hand side of the element (or section title) and click and drag your element or section to its new location.
- To move an element to a different section, hover over the right-hand side and click the three dots that appear.
- Select Change section and choose the new section you want the element to belong to.
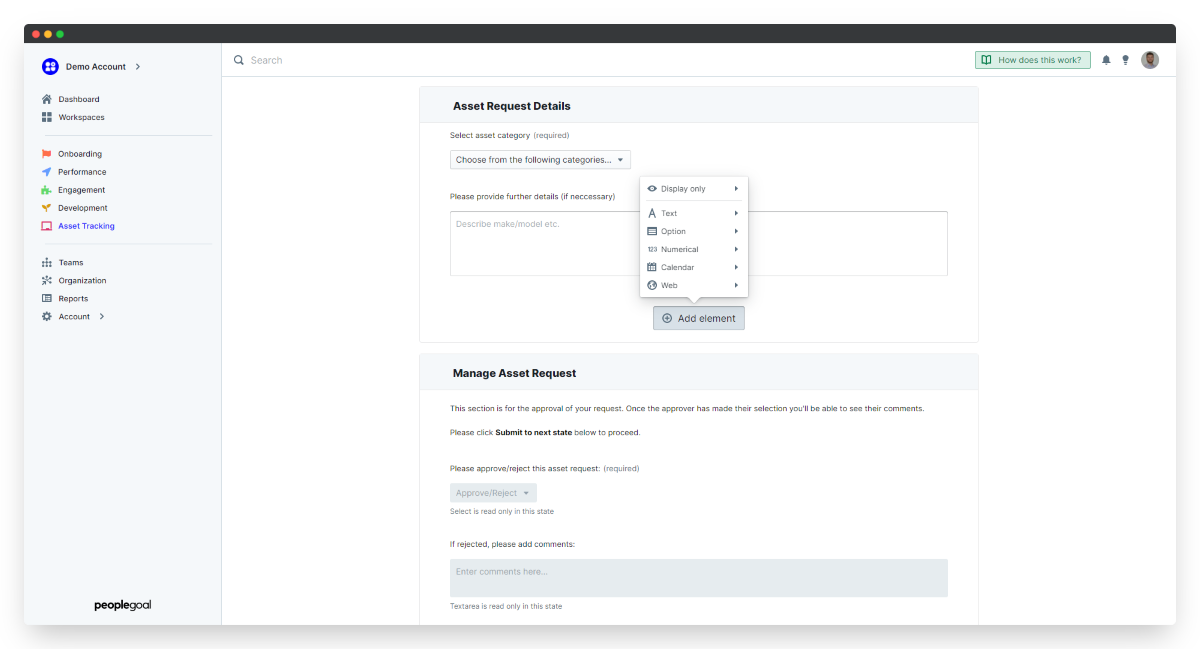
iv. Create new elements and sections
- At the bottom of each section, click Add element and select the element type you want to insert.
A new element that's useful to add to your first section is a display-only Description or Rich-text area. You can use this to detail the asset tracking process and explain exactly what's included.
To add a new section, scroll to the very bottom of your template form and click Add section. Then click and drag your new section to where you want it to sit in the survey flow.
- In the example, we add a section with a calendar element. This calendar will prompt employees to provide an estimate for the period of time that they intend to use an asset.
3. Configure the Asset Tracking App States
States are the steps in your Asset Tracking workflow, and each state has its own participant. The Request New Asset is one state and the Asset Requestor is the participant - likewise with the Asset Manager and Asset Holder recording and confirmation states.
There's no limit to the number of states you can add to your survey workflow. What's more, you can select whether each state is read-only, editable or hidden to the selected state participant.
i. Add a new state
- Click the + button in your workflow builder to create a new state.
- Enter your state name, define the participant, and choose a status flag.
- Toggle on/off whether sections are visible or editable by default (don't worry - you can override this later if you need to).
- Click and drag your state to reorder your tracking form workflow and you're done!
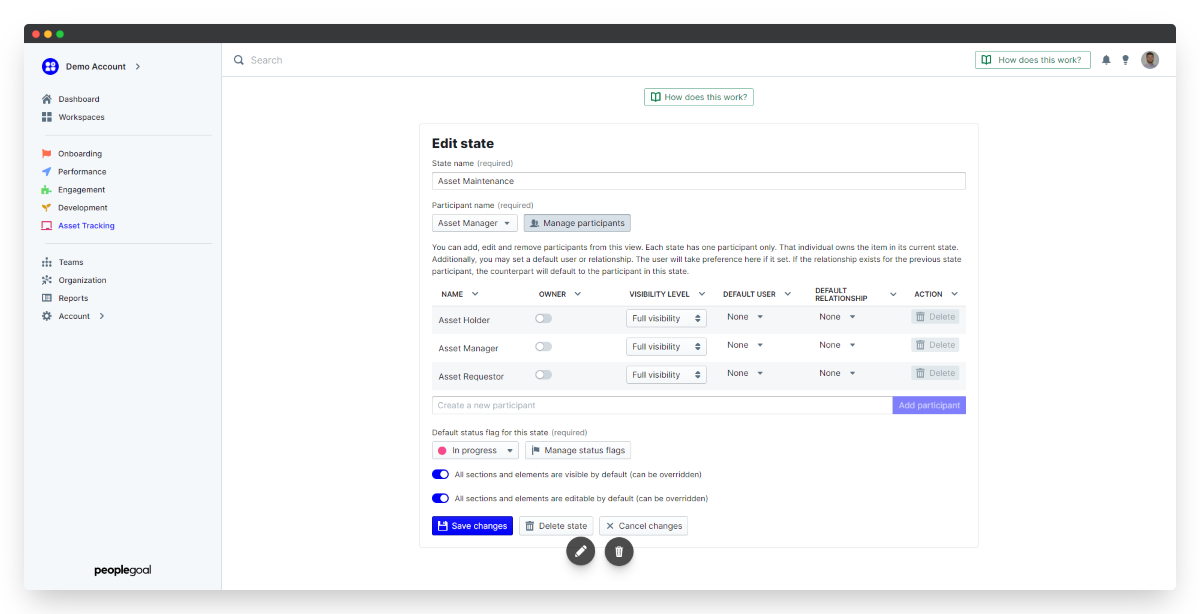
See how we add in a new state for Asset Maintenance for the Asset Manager. The purpose of this final state will be to ensure that the relevant checks are made by the Asset Manager once the Asset Requestor has finished using the asset. We will also need to include a new section below Asset Details, named Asset Condition. This section is can only be edited by the Asset Manager so we'll make it read-only in the other states. Here the Asset Manager can update the others on the condition of the asset and if there is any new damage or if any repairs are necessary.
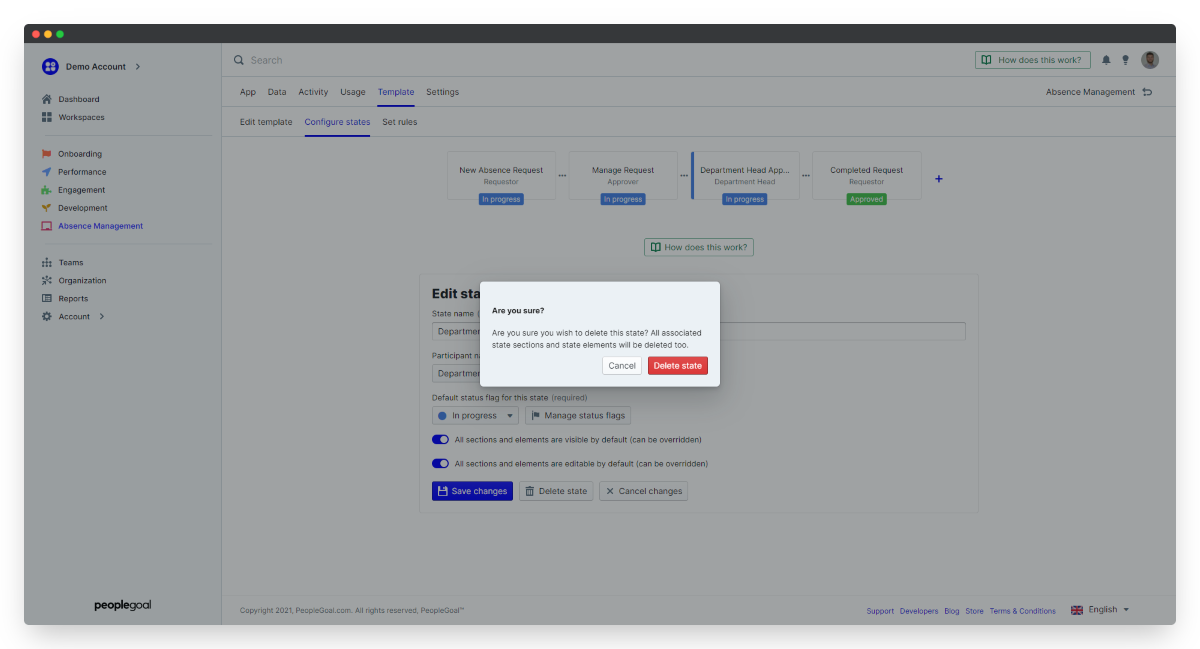
ii. Delete a state
- To take out a state you won't be using, click the Template tab and select Configure states.
- Select the state you want to delete and you'll see the blue highlight bar appear to confirm which state you've selected.
- Click Delete state to remove it completely.
iii. Customize your status flags
Every state has a default status flag that indicates to all participants what stage of the process their item is in. Your Asset Tracking app is set up with default status flags which you can customize.
- In the Configure states menu, click on Manage status flags.
- Click a flag title to rename it, and click the color picker to choose a new flag color.
- Click Create a new status flag to add an additional flag.
- Select the state to which you want to assign your flag, choose which flag to give it and click Save changes to update.

We recommend that you delete any unused status flags so that they don't clutter up your Item filter once you've launched your tracking forms. You may want to alter the colors of your flags or as we've done create a new status flag titled "Awaiting Approval" for when the form is between states for approval.
4. Manage your Asset Tracking App Participant and Permissions
Participants are the individuals involved in the Asset Tracking form and each state has one participant. To automate your Asset Tracking process you can create default participants based on your account Relationships, define an individual as the state participant, or leave these blank to allow the employee to select all participants when they come to fill in the form.
Setting up your participants based on relationships means that when an employee creates a new form, all of the people who need to be involved in the workflow are automatically assigned.
i. Set default relationships and users
- Open up the Configure states menu and select Manage participants.
- For each participant set a default user or default relationship to automate the tracking form workflow.
- You can also rename the participants to suit your company language.
In our example, we have designated the default user for the Asset Manager role to Chet Hirthe, as they are going to be responsible for all of the assets in our company. This way whenever an employee makes a request for any company assets, they will be notified.
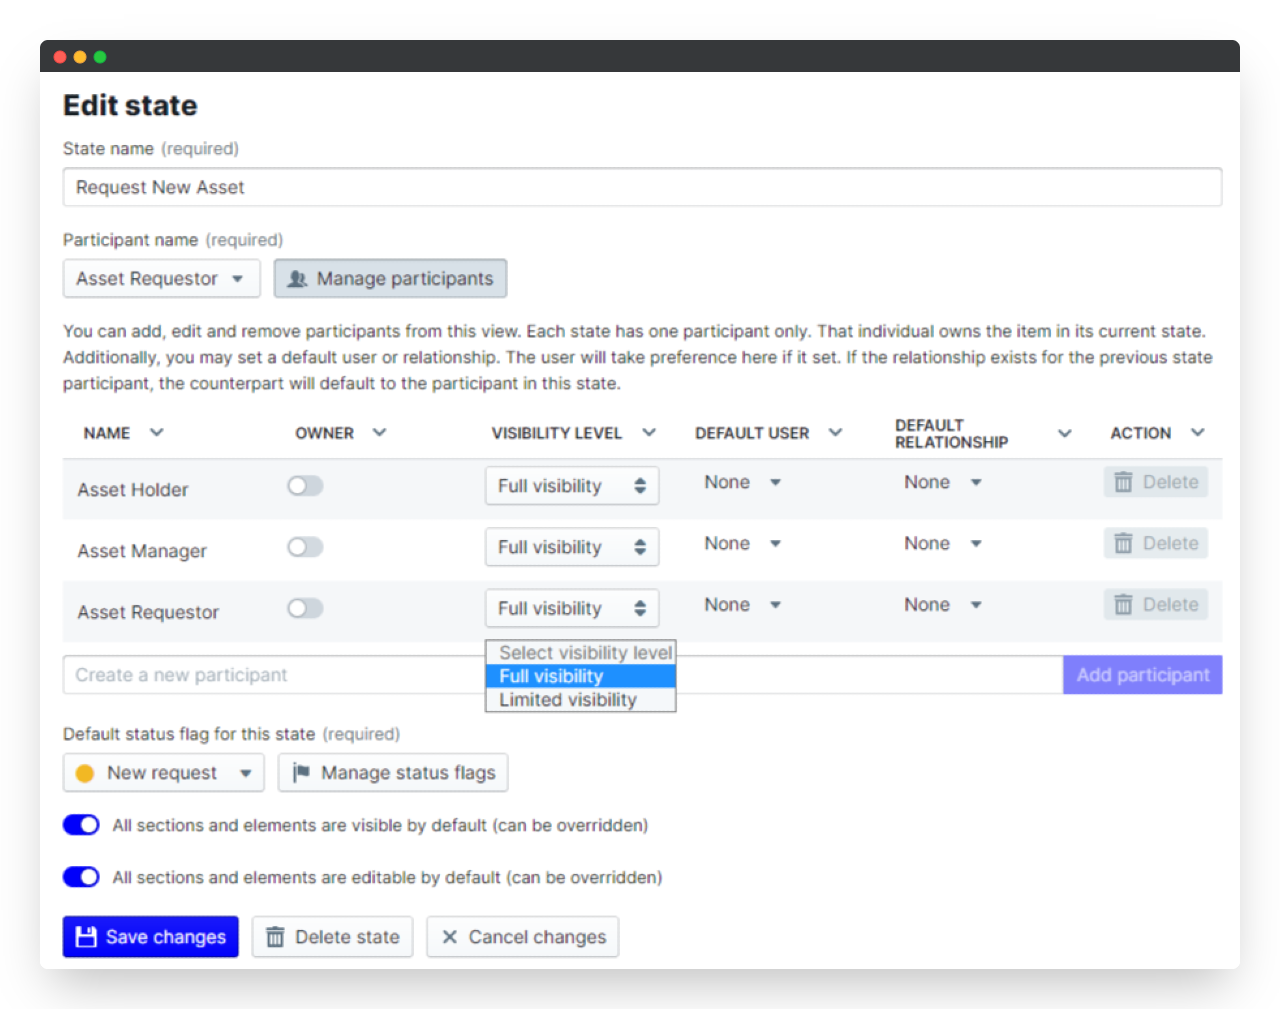
ii. Define the participant's visbility
If you have lots of different participants you need to control who can see the data at every step. Visibility defines whether a participant can see the review only in the state that they own (limited visibility), or in all states (full visibility).
By default participants can only see the form when it's in a state that they own. For Asset Tracking, all participants should have full visibility because we want them to see the discussion and comments mad by all involved in assigning assets before they are officially released. The employee will see the form in the first and last state - when they draft their request and again when it comes back to them for the final confirmation. These are the states where the employee is the participant.
The asset manager and holder will also both have full visibility over the whole process - even when they're not directly participating.
- To change a visibility level, click the drop-down next to the participant name and choose Limited or Full visibility.
- Click Save changes to lock in your updates.
iii. App-wide permissions
Permissions control the access to your app within your PeopleGoal account.
- To set your permissions, click on the Settings menu, then expand the Permissions section.
- Click on Explain permission types to understand the access that each permission gives your account users.
In your Asset Tracking form, we'd recommend you set the permission to Create only. This means employees can create forms for themselves but can't see any colleagues' forms since this isn't really necessary and prevents confusion.
ii. Specific team and user permissions
The user who installed the Asset Tracking app template has Owner permission by default and can assign specific permissions to other teams or users. Specific team and user permissions replace the default permission type.
- To assign a specific permission, select Configure specific permissions, then under "User permissions" click Add user.
- Type your colleague's name to add them to the permissions list. In the "Permission type" column, select which permission level to give them.
You might want to give "Create and view" permission to your C-Suite so that they can oversee the status/ omments for all Asset Tracking forms but without being able to change the app settings or edit forms they're not a participant in.
5. Creating Reports
Every single data point entered in apps from PeopleGoal are collated and can be used in data analysis. To see the data at work, jump over to the Data tab and marvel at the wonders of the numbers.
From here you can sort and filter any categories you like. Whether you want to know what the most requested asset is or the time at a certain time of the month that assets are most in-demand, you can play around with the various charts and responses to determine what matters the most to your company. This tool is really powerful and can make a difference in optimizing how your company uses all of its assets. Analyzing the activities and demand for particular assets can reveal a lot about how you may want to distribute assets amongst team members.
The options are limitless... well as limitless as your form's questions but you get the point. Check out our Reports building article to learn how to create custom reports and charts.
6. Launch your Asset Tracking Forms!
There you have it, your Asset Tracking Process is all set and good to go! All you need to do now is invite your employees to start making New Asset Requests. You are able to create and assign these yourself or have users make their own as and when they need to.
- To create a new form, select New Asset Request and then select the participant(s).
- To start a form for yourself select your own name.
- To start forms for multiple individuals, click Select user(s) and search for individual employee names.
- Or, click Select team(s) of users and you can kick off forms for entire user groups!
Having got your Asset Tracking Forms built and customized to your needs, take some time to explore the other apps you can install within your HRIS workspace. We recommend implementing Time Tracking to maintain a better understanding of the hours worked by all employees, along with a record of the tasks they performed each day. Moreover, Absence Management can be really useful to monitor the amount of holidays employees have left or for tracking individuals on sick leave. You'll find these and more in our App Store.
Don't have a PeopleGoal account yet? Book a demo to see our no-code HR workflow builder in action!


PeopleGoal Support Team
Account Management & Implementation Specialists


