
Support Center.
Get Started or Become a Pro. Browse our support articles to learn how to get the best out of PeopleGoal.
How to run Employee Development Plans
The progression and success of a team is dependent on their commitment to learning and development. It's important to create an employee development plan that will get the most out of your team members. A clear and well-prepared plan can motivate employees to engage with their development and consequently become better equipped to fulfill their responsibilities to a higher standard.
Creating an effective employee development plan with PeopleGoal is a walk in the park. In this 'How-to' we will take you through the steps to get your development plan up and running. Our pre-built template is ready to use from installation. If you'd like to tweak the plan in accordance with your specific needs this can easily be done using our simple, no-code workflow builder.
1. Install the Development Plan app template
2. Customize the Development plan app template (optional)
3. Configure the Development plan states (optional)
4. Manage your app participants
7. Schedule recurring Development meetings (optional)
1. Install the Employee Development Plan app template
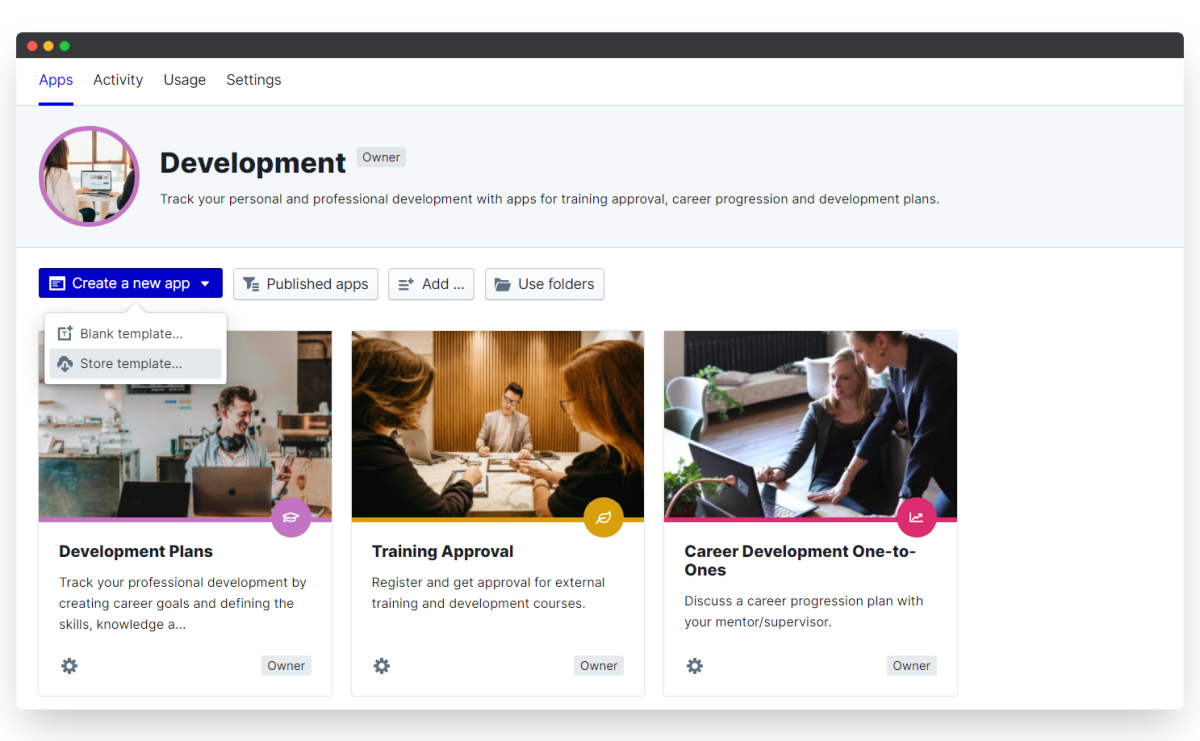
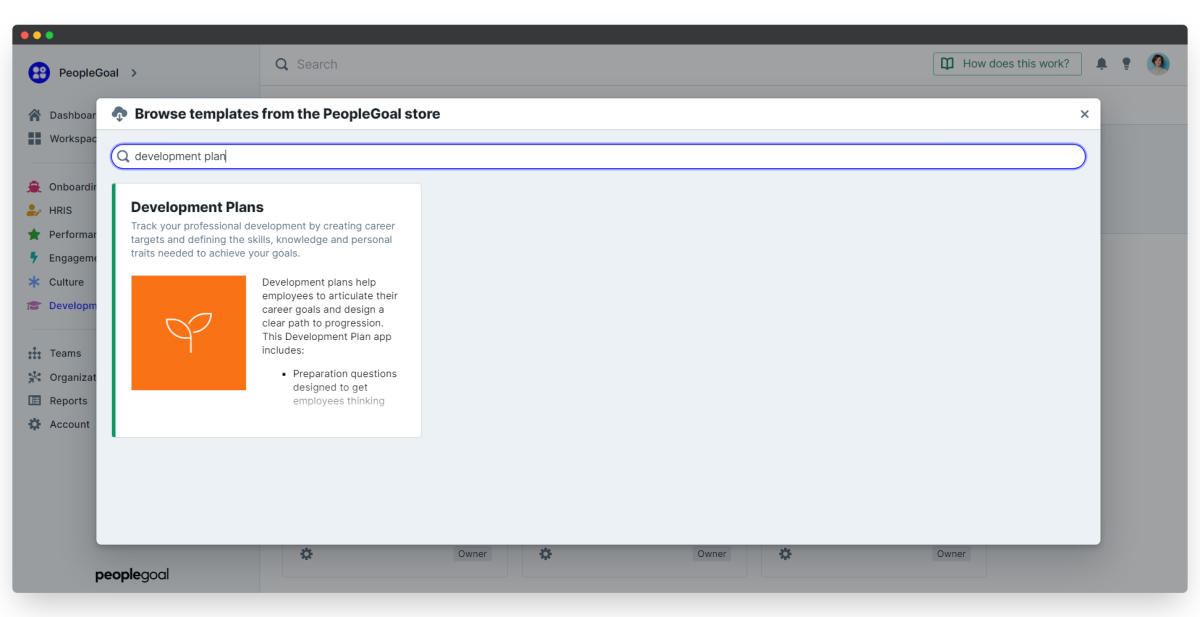
- Open up any workspace, click Create a new app, then select Store template.
- Select the Development plans app and click Add this to your account.
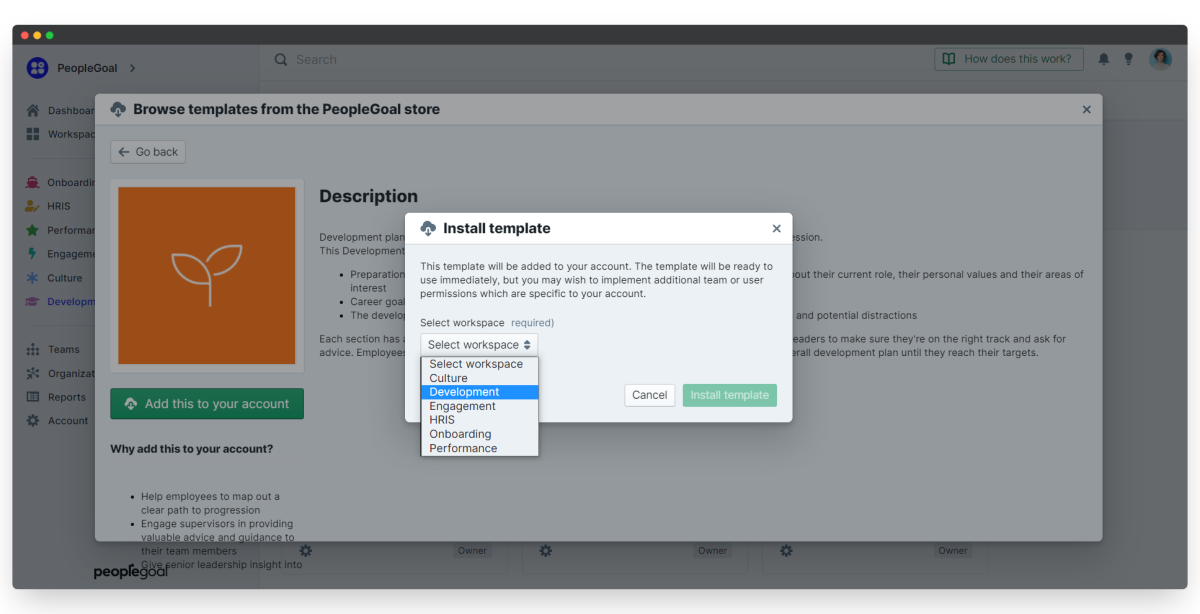
- Select the workspace (and workspace folder) you want this app to belong to from the drop-down menu, then click Install template.
We'll take a few seconds to add this to your account.
All of the pre-built development plan questions and states are installed and ready to go. You can use the app right out of the box! To skip the customization, jump down to step 4 and set up your app participants and permissions.
2. Customize the Development Plan App Template
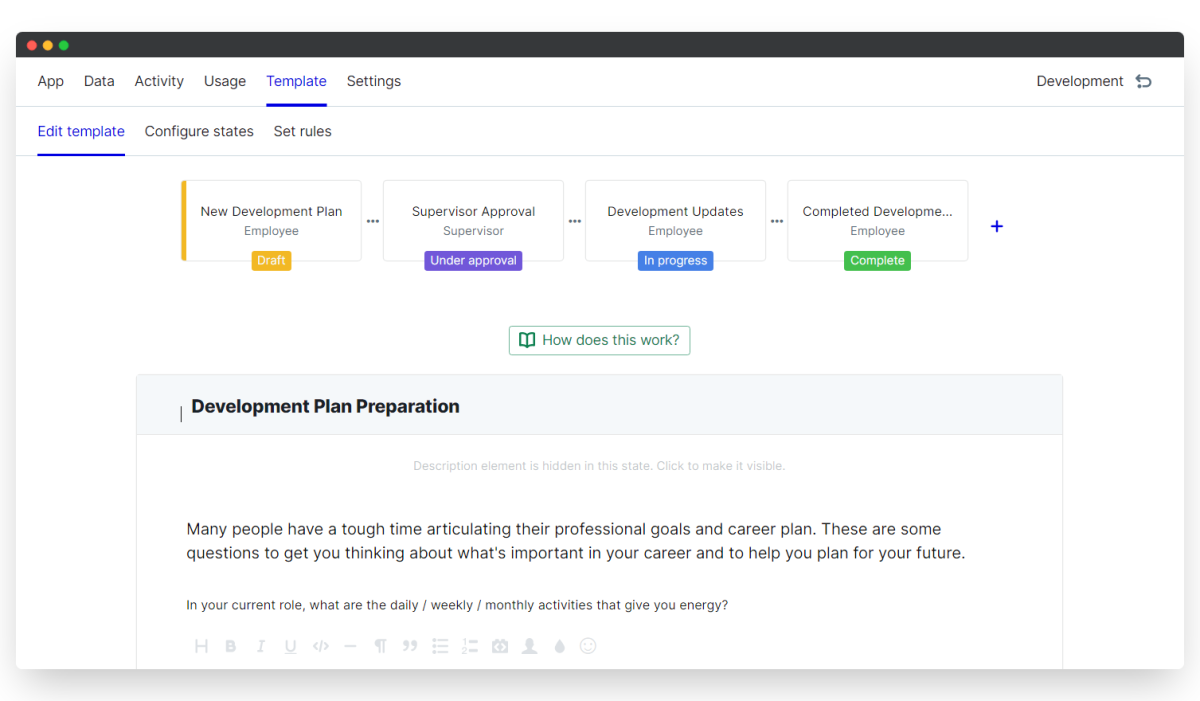
If you do want to configure the development plan to add your own questions and states, click the Template menu, then Edit template.
i. Edit existing elements
Elements are your individual form fields that make up your development plan. Whether they're text questions, rating selects, display-only fields or numerical calculations, every element can be changed to suit your custom process and company culture.
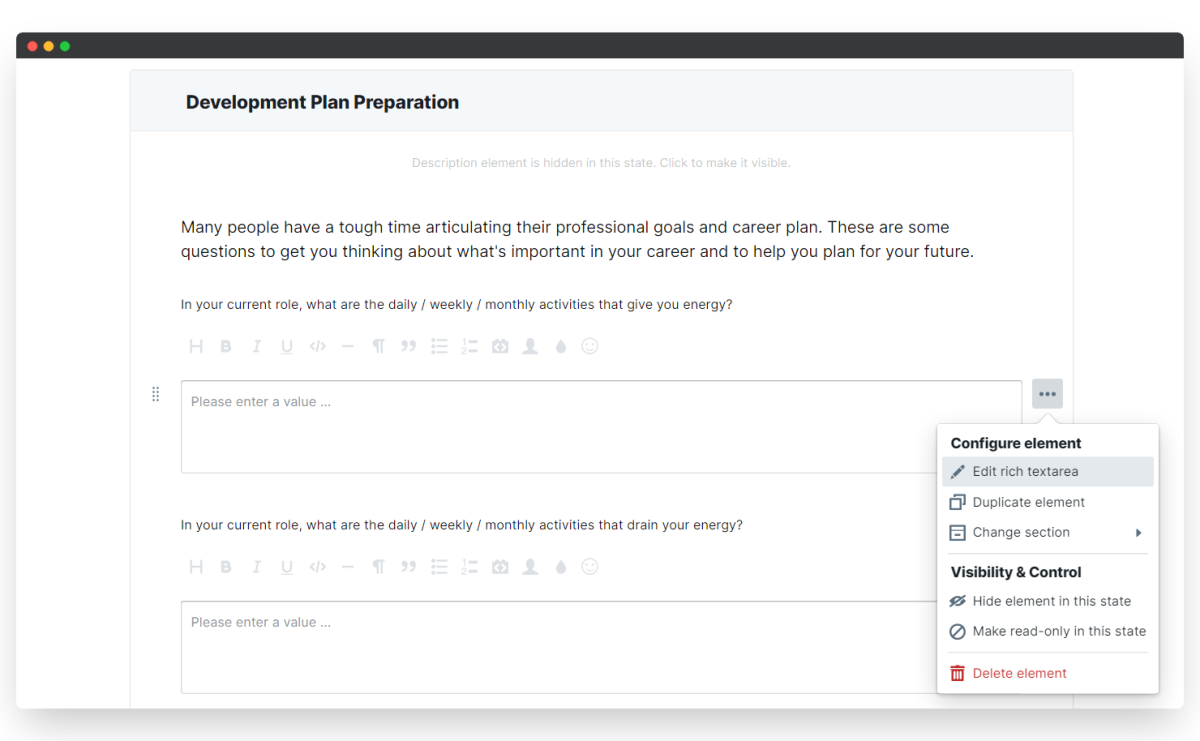
- To change a field, hover over the right-hand side of the element and click the three dots that appear.
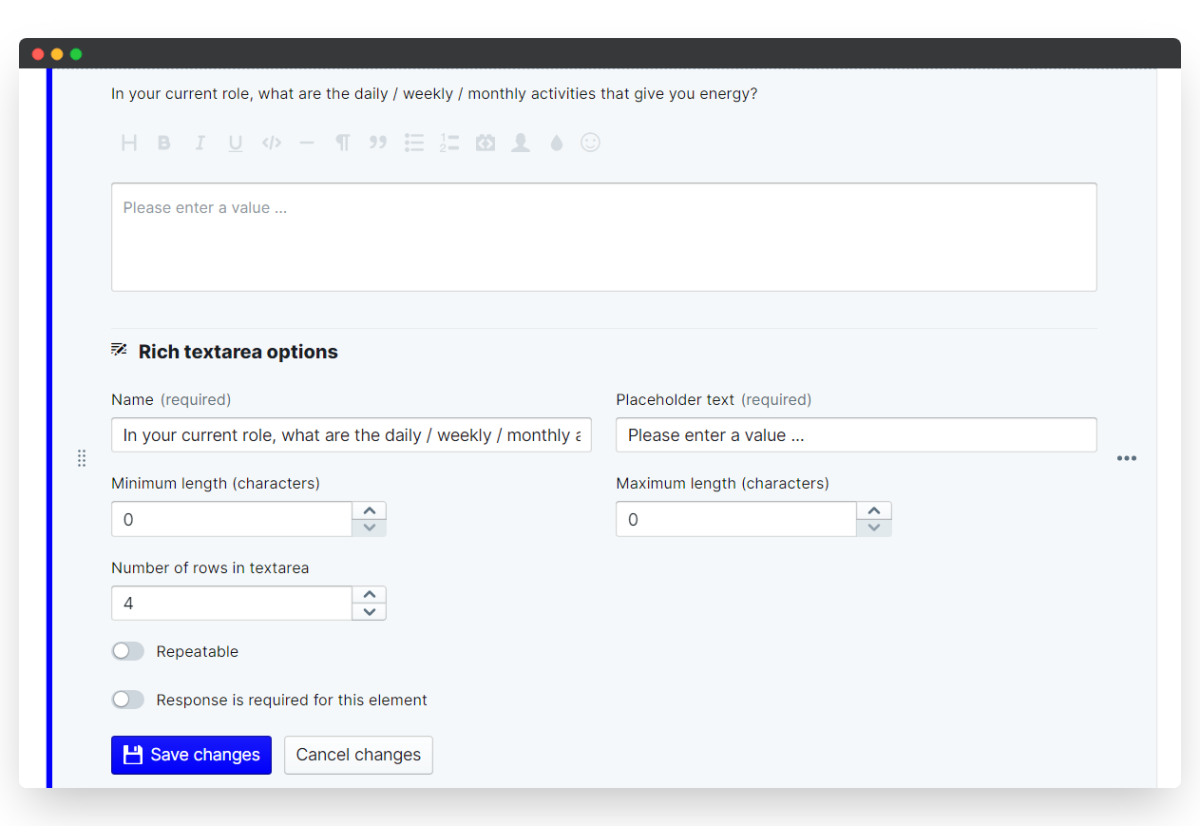
- Select Edit element (your element will have a name like "Select", "Description", "Rich-text area", etc.). The element editor will open up.
- Change any fields you need to and click Save changes to update.
From this example, you can see how we've changed the questions prompting employees about activities that "give or drain their energy" to instead ask them to describe how they feel when performing their most and least favorite activities at work. Furthermore, they have been set to "not required" so that it's an optional response.
Each element is unique, so if for example you change the rating set on one element you'll need to change any other questions to match this. Don't worry, it's quick and easy to duplicate an element once you're happy with its setup.
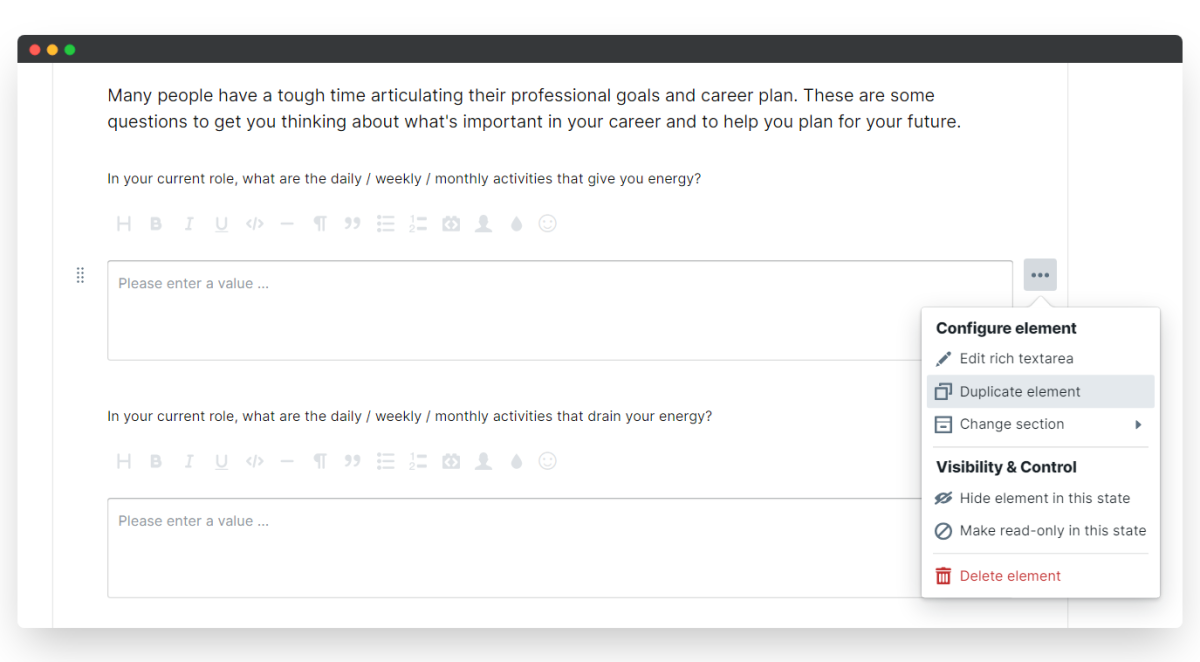
ii. Duplicate elements
- Hover over the right-hand side of the element and click the three dots that appear.
- Select Duplicate element and an exact copy will be created below.
- Edit the duplicated element to change your question text.
iii. Reorder elements and sections
Reordering is a breeze - all you need to do is click and drag to change the element or section order.
- Hover over the left-hand side of the element (or section title) and click and drag your element or section to its new location.
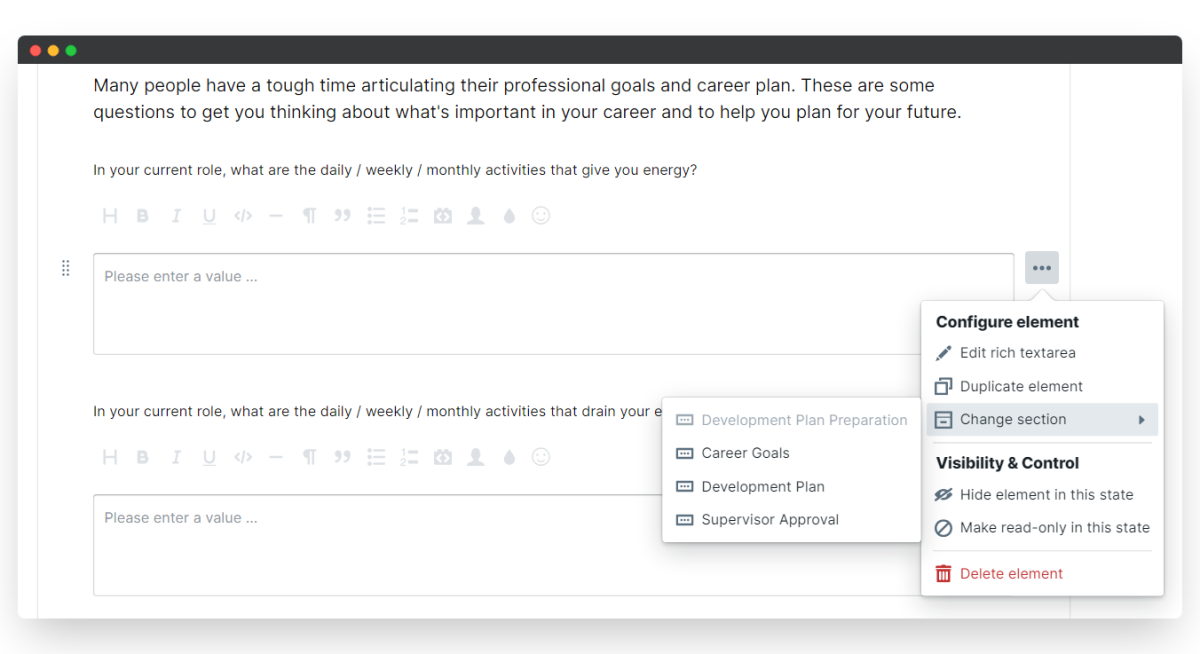
- To move an element to a different section, hover over the right-hand side and click the three dots that appear.
- Select Change section and choose the new section you want the element to belong to.
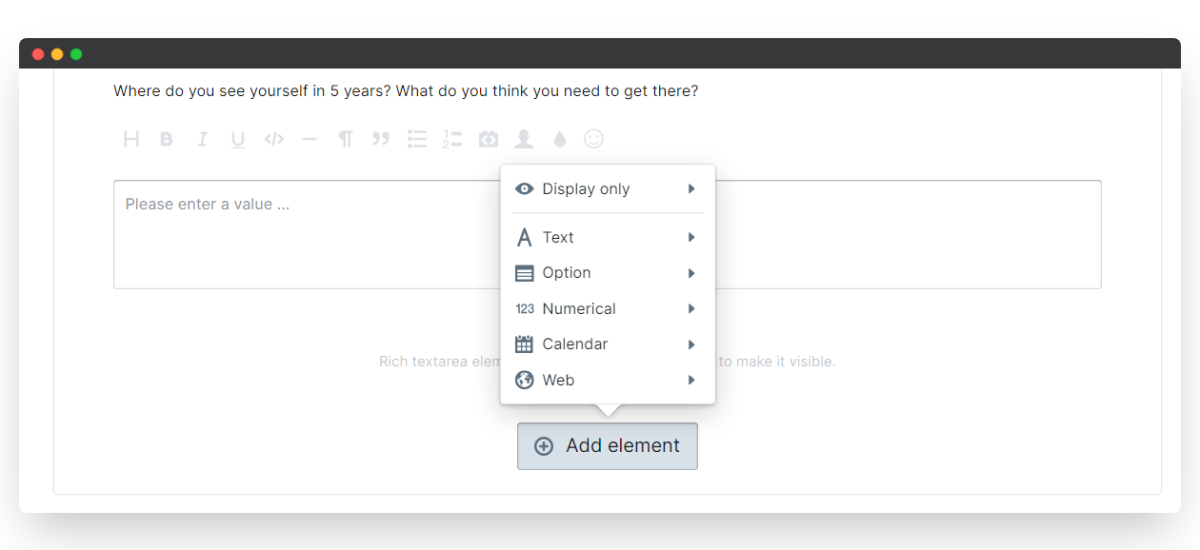
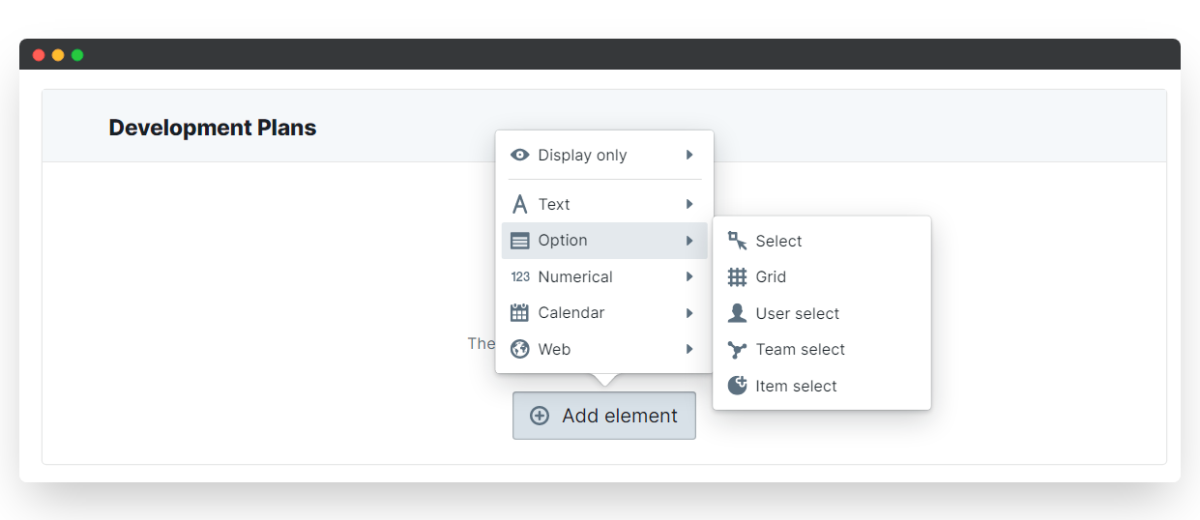
iv. Create new elements and sections
- At the bottom of each section, click Add element and select the element type you want to insert.
A new element that's useful to add to your first section is a display-only Description or Rich-text area. You can use this to remind employees and managers of the core target for development, or give instructions on areas to focus on for their development plans.
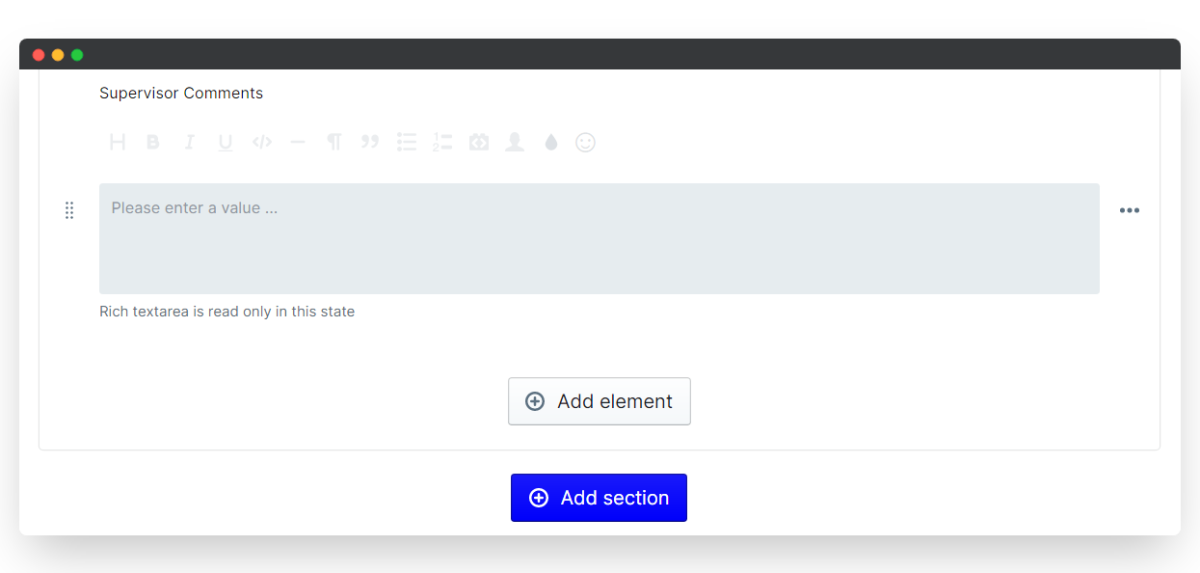
- To add a new section, scroll to the very bottom of your template form and click Add section.
- Then click and drag your new section to where you want it to sit in the review flow.
This example demonstrates how we can add a new section for an employee to upload evidence for their development. Prompting employees to post an image or hyperlink that can prove that the employee is doing as instructed is great to track the compliance of your employees in accordance with your guidance.
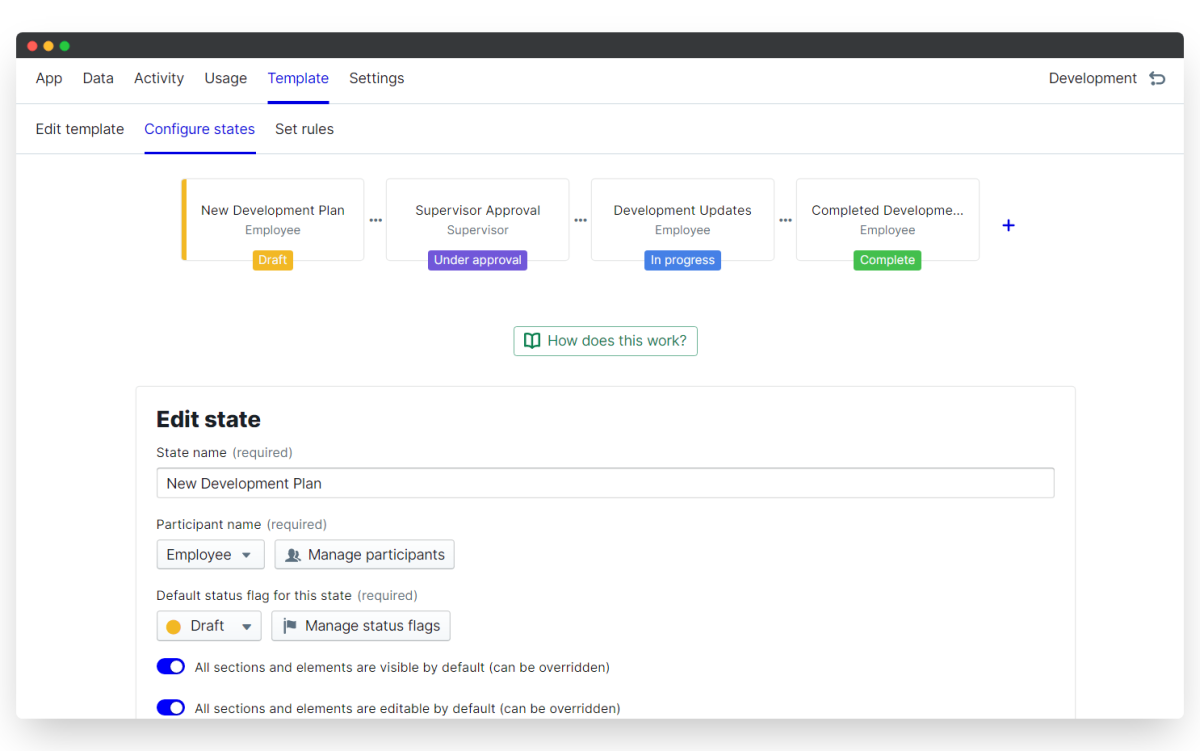
3. Configure the Development Plan App States
States are the steps in your Development plan workflow, and each state has its own participant. The employee New Development Plan is one state and the employee is the participant - likewise with the Supervisor Approval state and any others.
There's no limit to the number of states you can add to your Development plan workflow, allowing you easily create a complex process where every stakeholder can participate. You can also control the visibility of sections (and individual elements!) in every state, and select whether they are read-only, editable or hidden to the selected state participant.
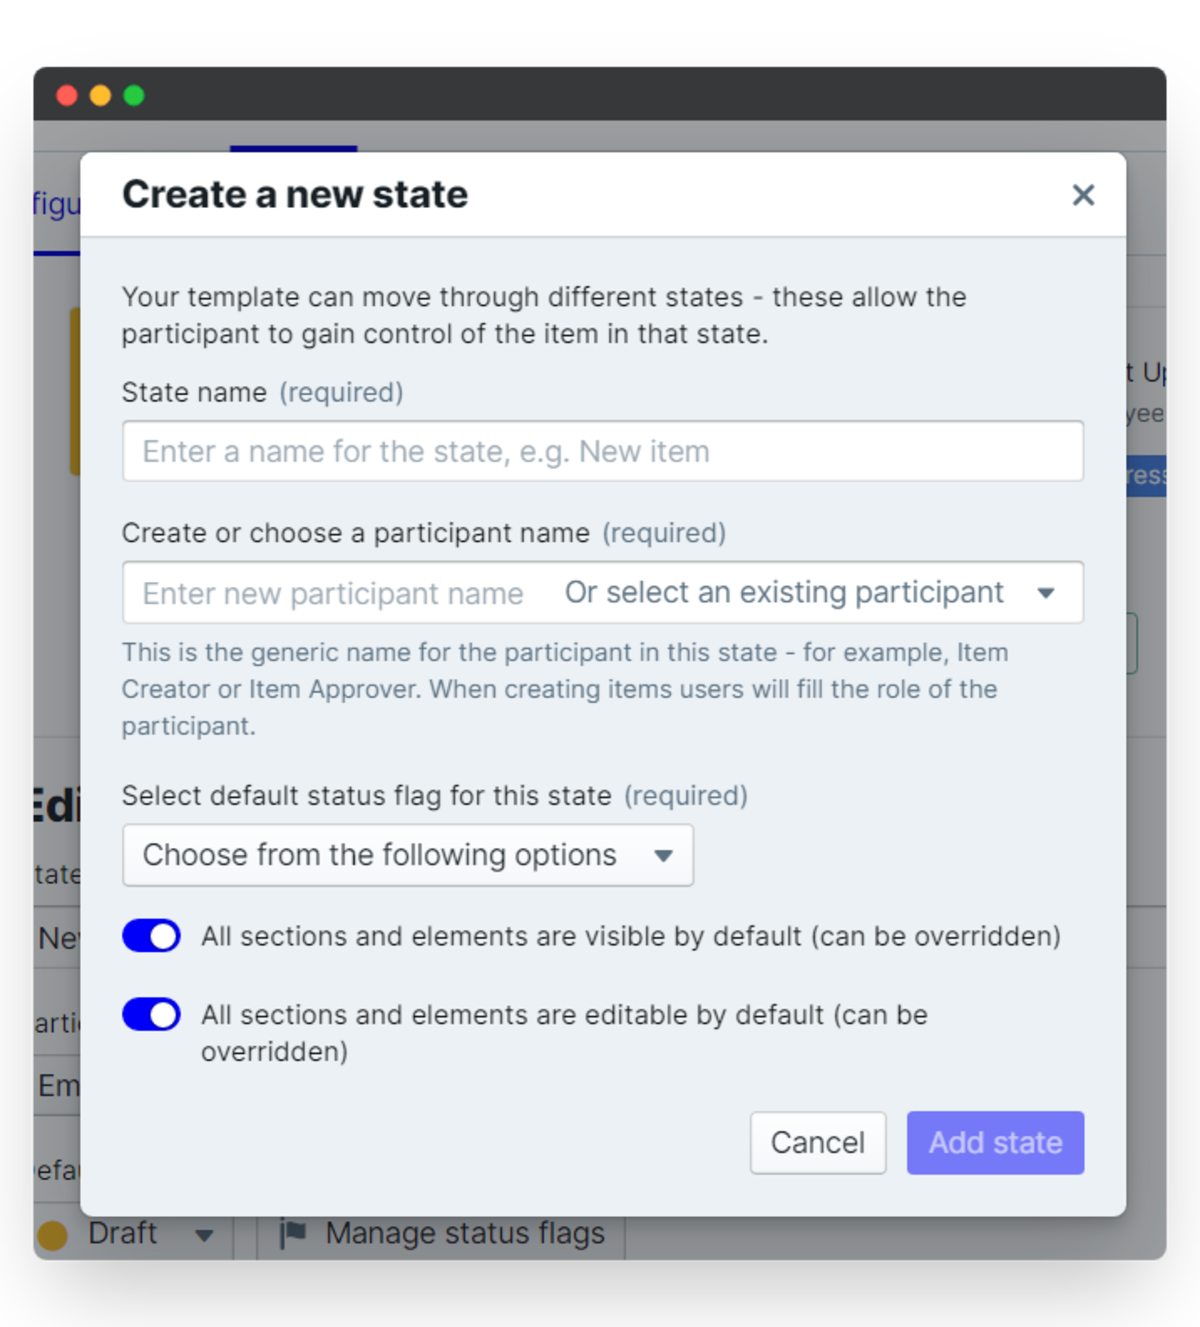
i. Add a new state
- Click the + button in your workflow builder to create a new state.
- Enter your state name, define the participant, and choose a status flag.
- Toggle on/off whether sections are visible or editable by default (don't worry - you can override this later if you need to).
- Click and drag your state to reorder your Development plan workflow and you're done!
In our example, we added a section for a second supervisor's approval. We're going to create a state for this section so that we can define the second supervising participant and allow them to give their input on the employee development plan. This section should only be accessible to the second supervisor, as such we will hide this section from other states. Since this supervisor needs to be able to see the responses from other participants we must make sure all other sections are set to read-only. For this, we must also ensure that the second supervisor state is editable in the appropriate state.
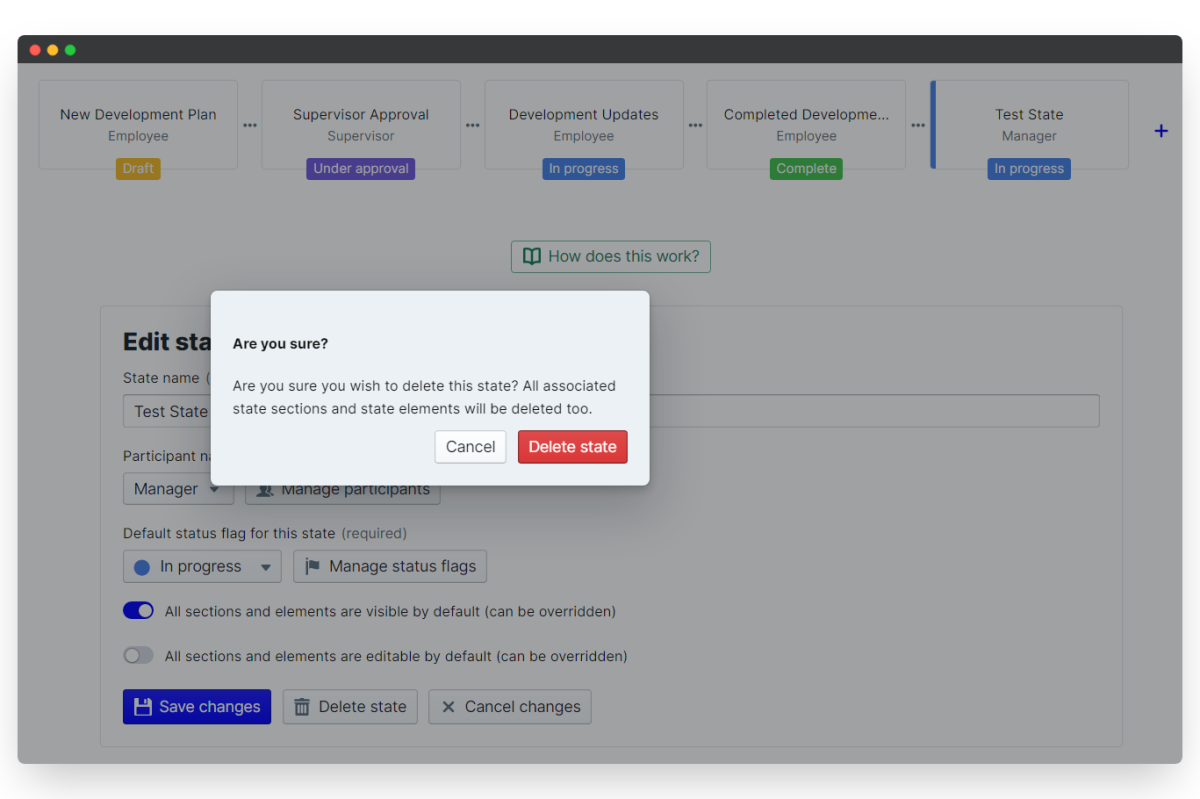
ii. Delete a state
- To take out a state you won't be using, click the Template tab and select Configure states.
- Select the state you want to delete and you'll see the blue highlight bar appear to confirm which state you've selected.
- Click Delete state to remove it completely.
In this example we no longer have a need for the second supervisor, so we can delete the necessary state. Remember to also delete any sections relating to that state participant, too!
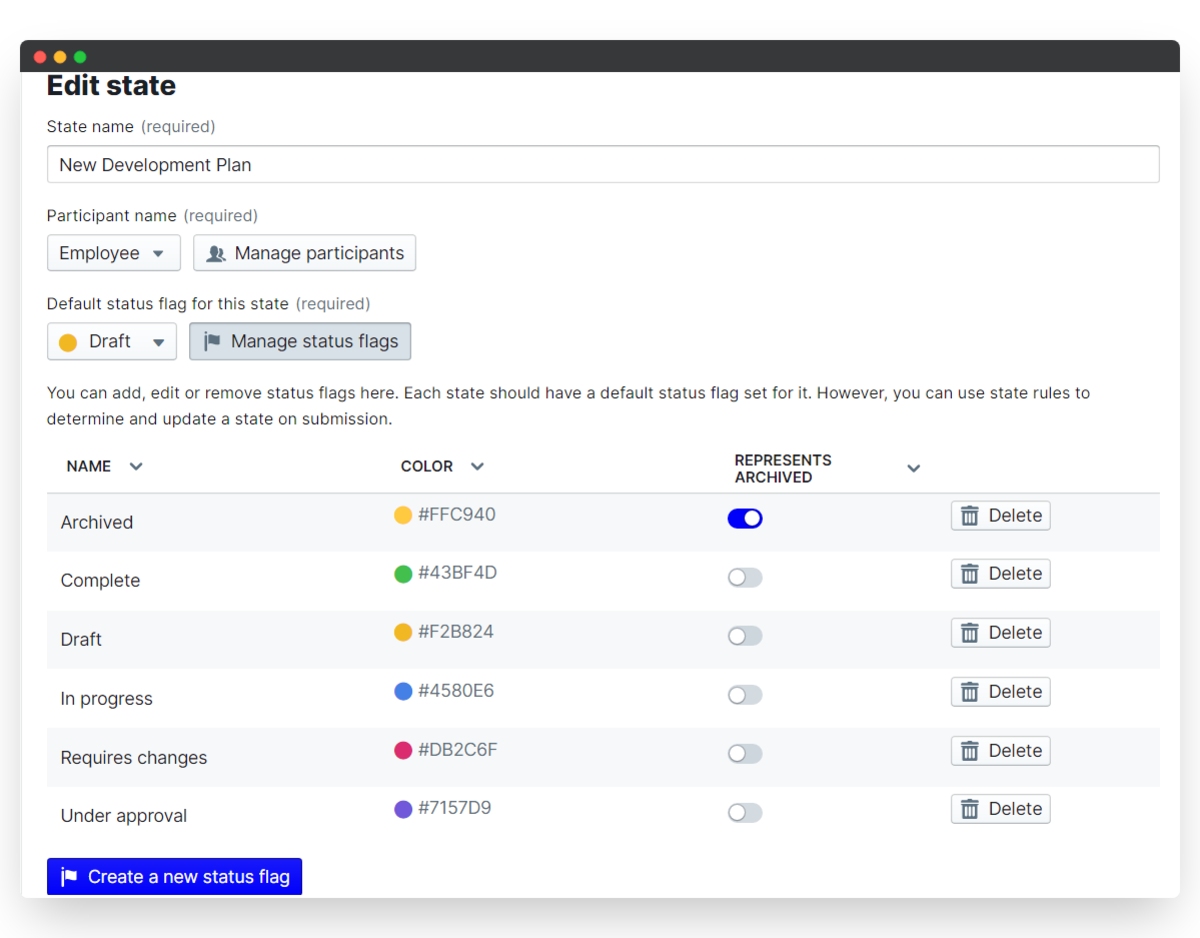
iii. Customize your status flags
Every state has a default status flag that indicates to all participants what stage of the process their item is in. Your Employee Development Plan app is set up with default status flags which you can customize.
- In the Configure states menu, click on Manage status flags.
- Click a flag title to rename it, and click the color picker to choose a new flag color.
- Click Create a new status flag to add an additional flag.
- Select the state to which you want to assign your flag, choose which flag to give it and click Save changes to update.
It's a good idea to delete any unused status flags so that they don't clutter up your Item filter once your Development plans are underway.
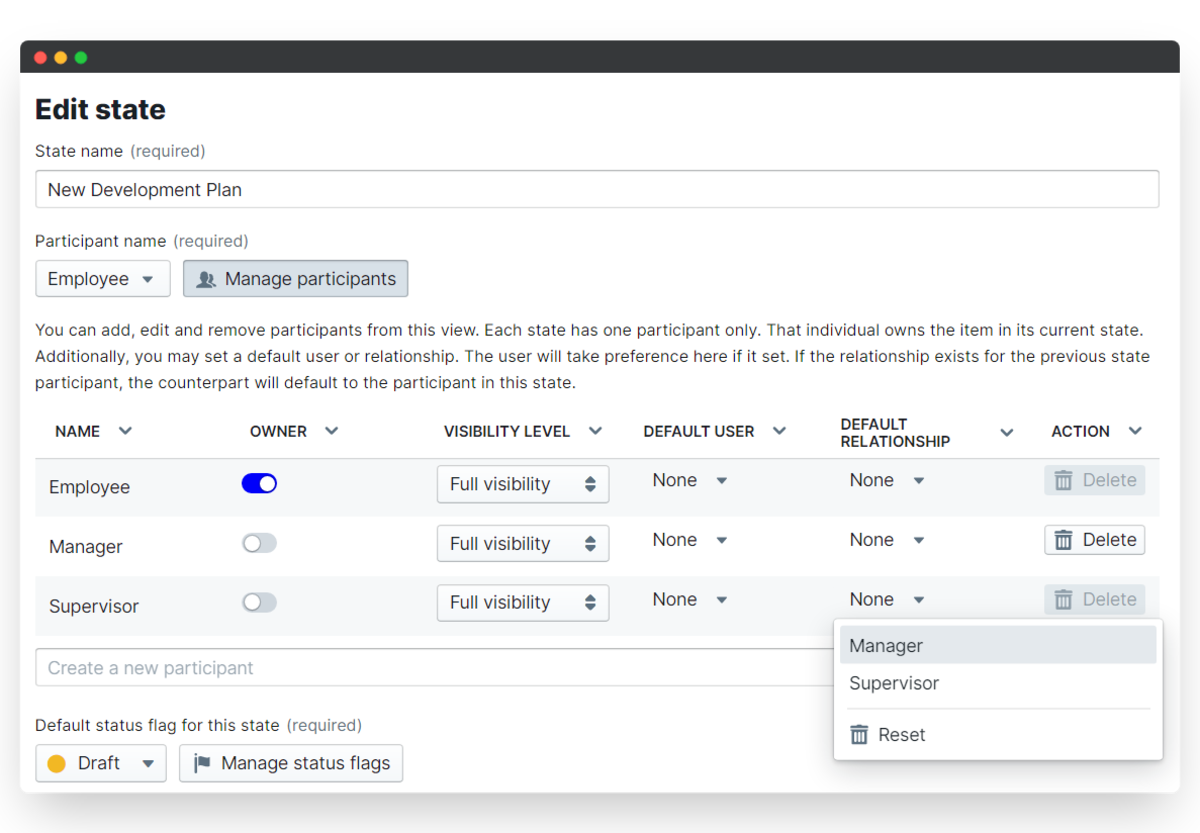
4. Manage Development Plan App Participants
Participants are the individuals involved in the planning of development and each state has one participant. To automate your development plans you can create default participants based on your account Relationships, define an individual as the state participant, or leave these blank to allow the employee to select all participants in their plan.
Setting up your participants based on relationships means that when an employee's development plan is opened, all of the people who need to be involved in the workflow are automatically assigned.
i. Set the default relationship and users
- Open the Configure states menu and select Manage participants.
- For each participant set a default user or default relationship to automate the development plan workflow.
- You can also rename the participants to match your own company language.
Below we will set the default relationship for the Supervisor to automatically be the user's Line manager.
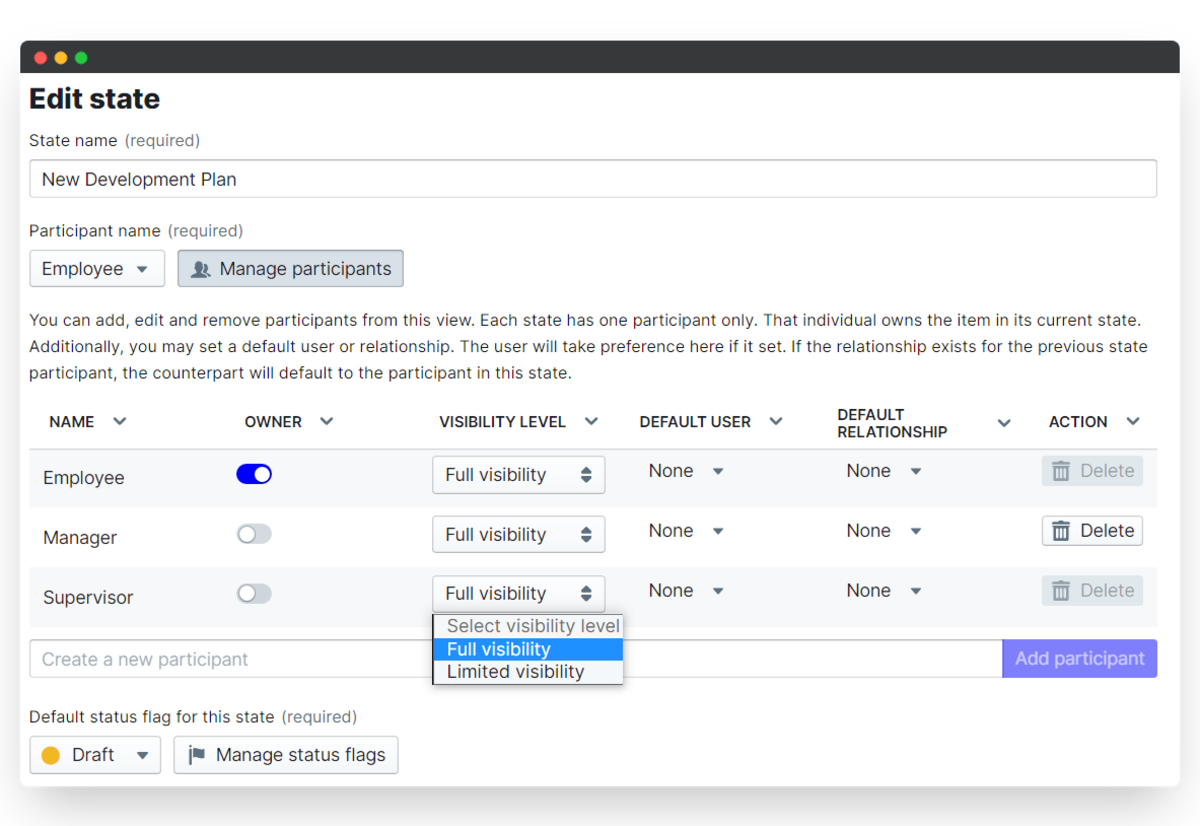
ii. Define the participant's visibility
The need to set certain visibilities will vary depending on how your company decide to go about your development planning process. Users can be given two defined visibility states - limited visibility will provide participants with access to see only the states that they own, whilst full visibility provides participants with access to view all states.
In our template, participants are able to see the states that they own. Since they ought to be involved in each step of their development, we believe maximum transparency in the process would be most beneficial. Of course, this can be changed.
- To change a visibility level, click the drop-down next to participant name and select Limited or Full visibility.
- Click Save changes to keep your updated visibilities.
5. Set the Development Plan App Permissions
We're almost at the end now! For our final step to automate the development plan workflow, you need to decide who can create, edit and/or view all of the Development plans in your account. To do so, we use Permissions. Permissions control the access to your app within your PeopleGoal account.
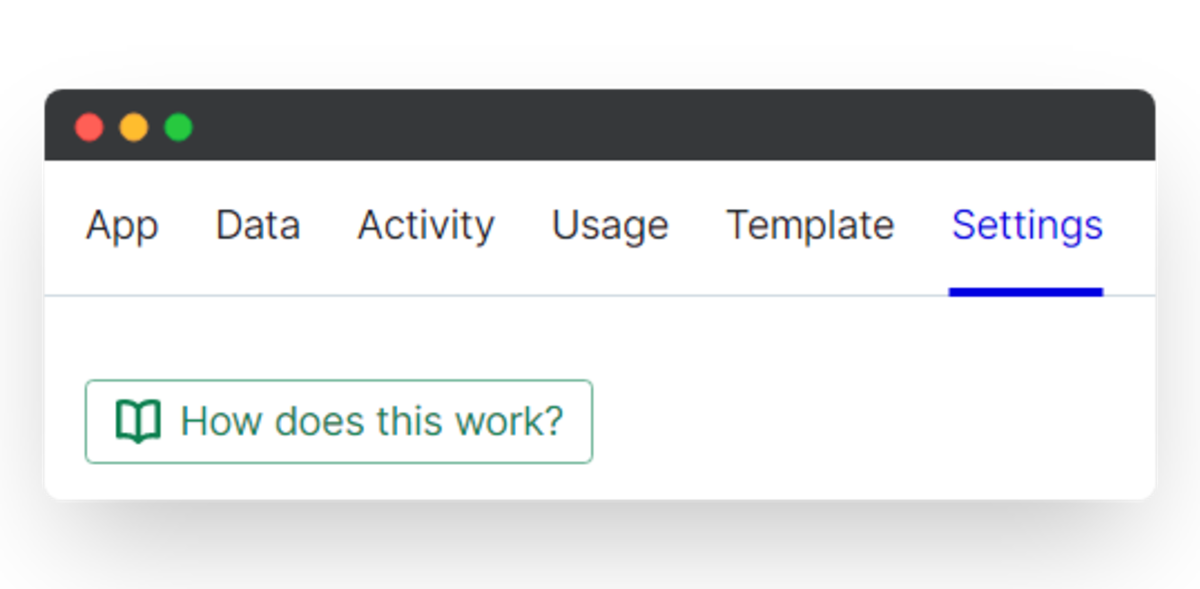
- To set your permissions, click on the Settings menu, then expand the Permissions section.
- Click on Explain permission types to understand the access that each permission gives your account users.
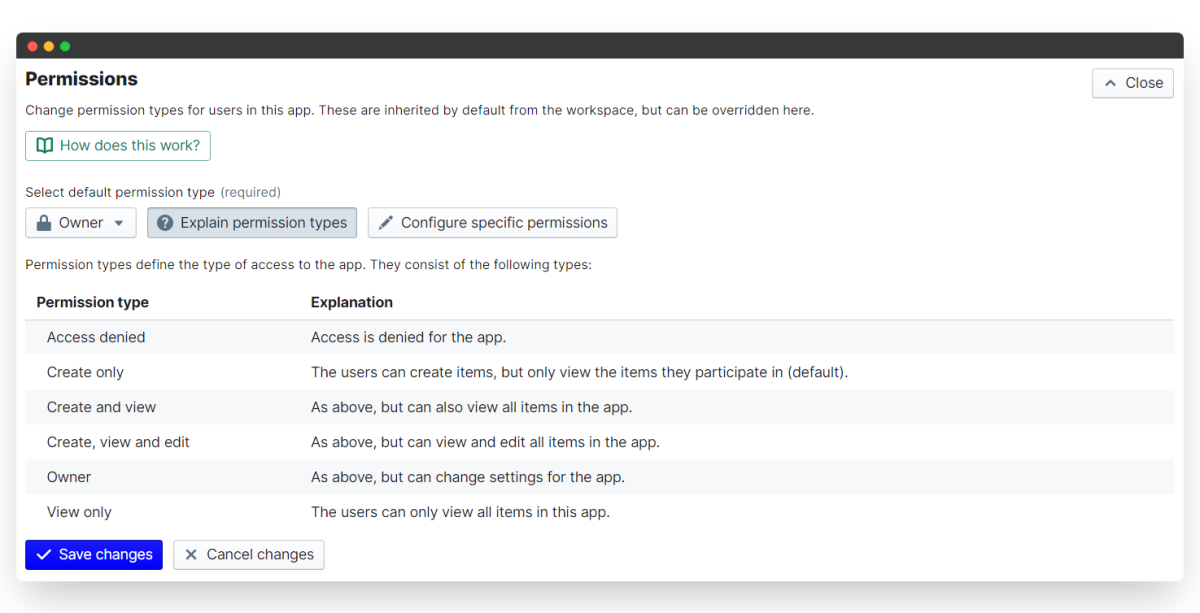
i. App-wide permissions
For development plans, you're best off setting permissions to Create only. This way, employees can create plans for themselves but will not be able to see the plans of any other colleagues.
ii. Specific team and user permissions
The user who installed the Development app template has Owner permission by default, and can assign specific permissions to other teams or users. Specific team and user permissions will replace the default permission type.
- To assign a specific permission, select Configure specific permissions.
- Then under "User permissions" click Add user.
- Type your colleague's name to add them to the permissions list. In the "Permission type" column, select which permission level to give them.
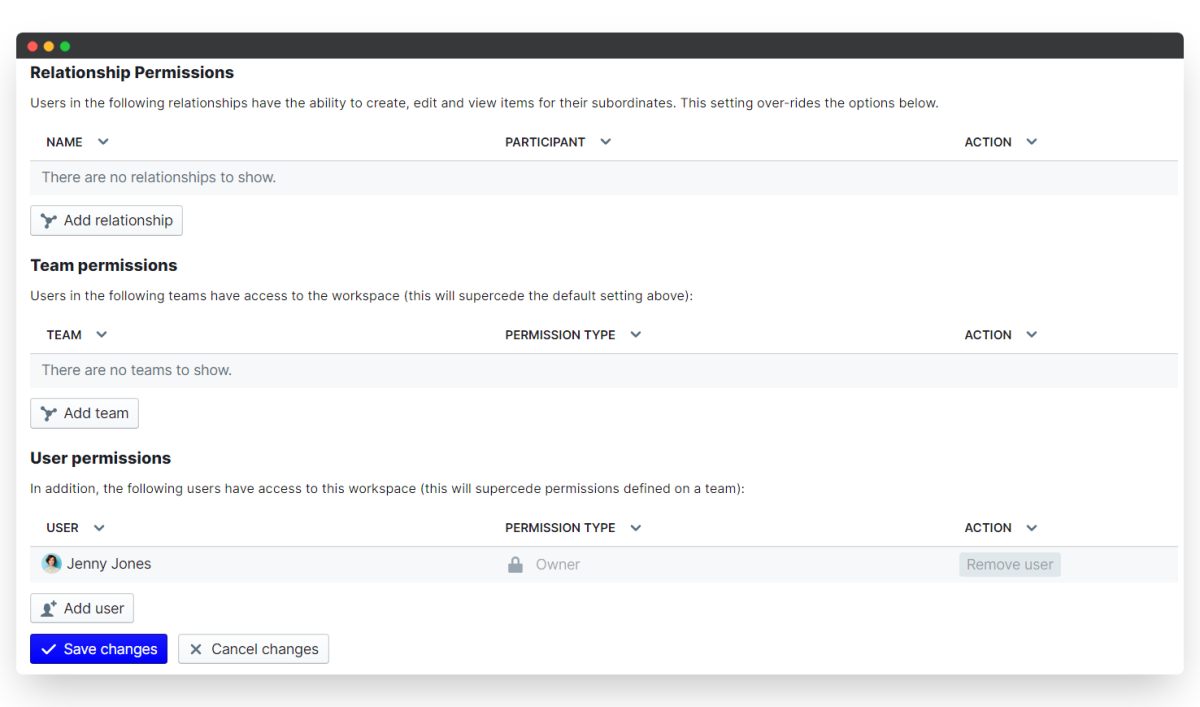
You might want to give "Create and view" permission to your C-Suite so that they can see all of the development plans for all employees, without changing the app settings or edit plans they're not a participant in.
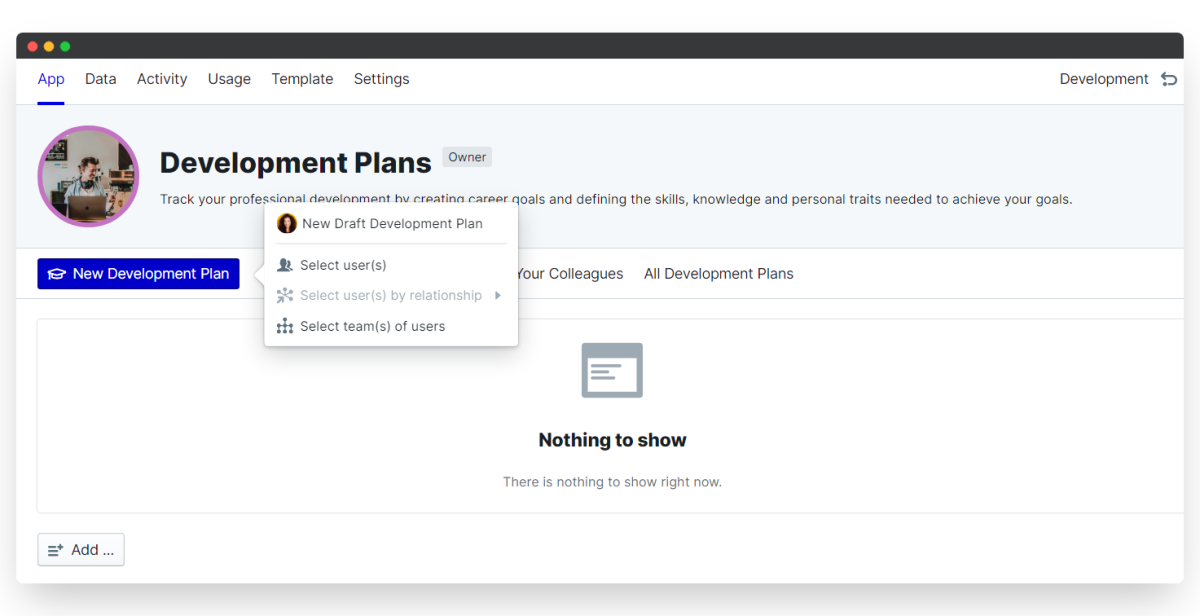
6. Launch your Development Plans
Good job! You're ready to go ahead and start initiating your development plans. All you need to do now is to create new plans for your employees to fill in. You are able to either create these for individuals or have users create plans for themselves.
- In both cases, click on the Development Plan menu and click New Development Plan.
- To start a plan for yourself select your own name.
- To start plans for individuals, click Select user(s) and search for individual employee names.
- Or if it suits, click Select team(s) of users and you can initiate development plans for entire user groups! Note: select your Company team here to start a plan for everyone in your account.
7. Schedule Recurring Development Meetings
Now that you've got your Development plans up and running, you may want to arrange a recurring meeting with employees to discuss their development.
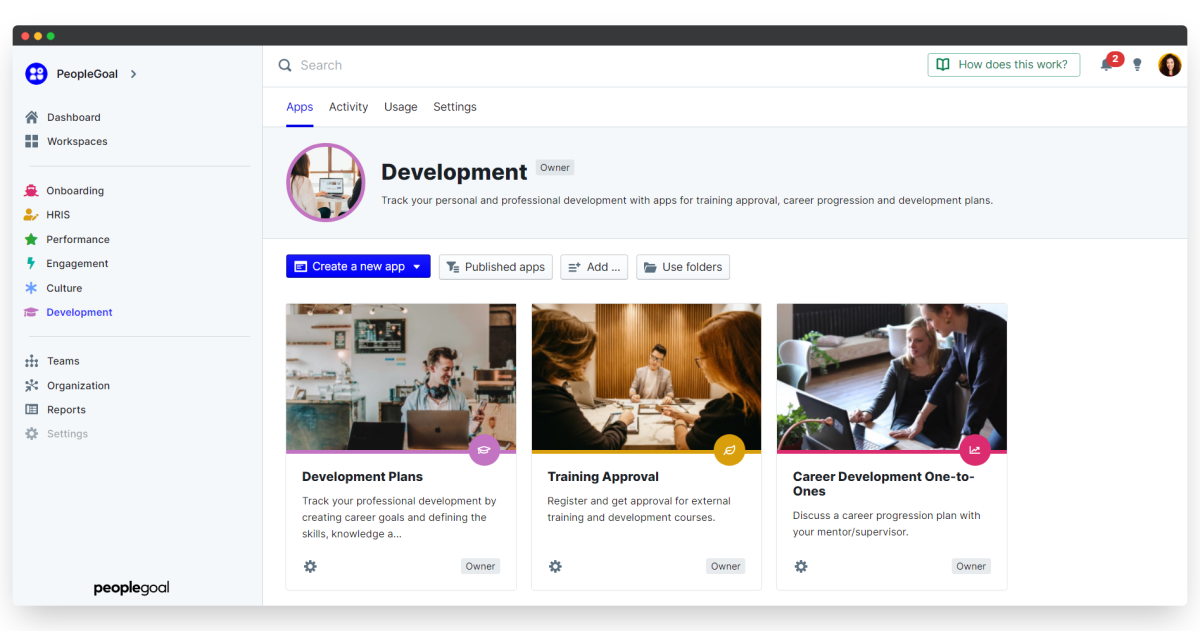
This is useful for managers that want to track development and ensure that all the training and learning is effective. To arrange these recurring meetings you can make use of the Career Development One-on-Ones app in the Development workspace.
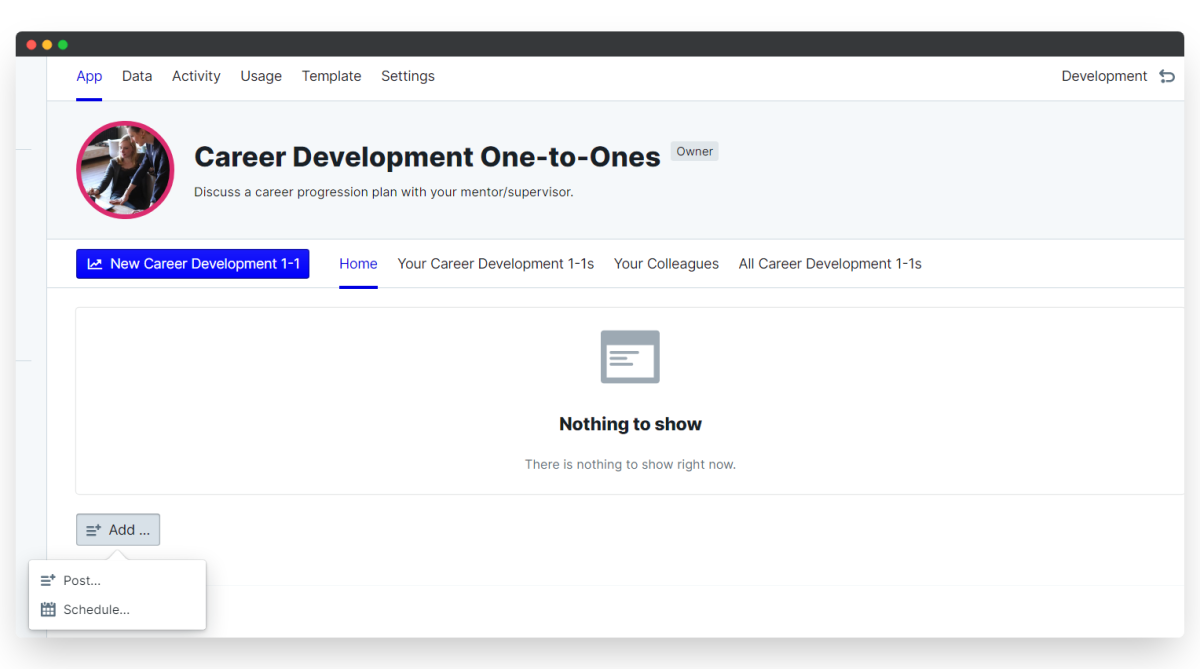
i. Arrange a one-off meeting
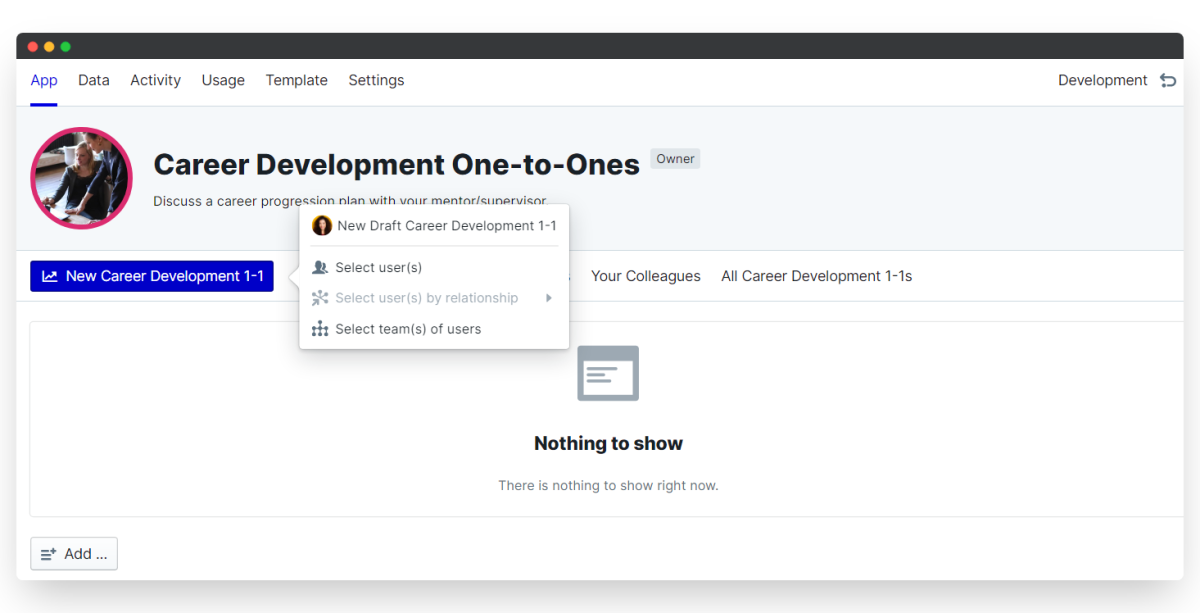
To schedule an independent meeting is easy enough. All you have to do is go to the app menu, select New Career Development 1-1s, and then fill in the necessary information. As always you can edit any of the questions/ elements to meet your specific needs.
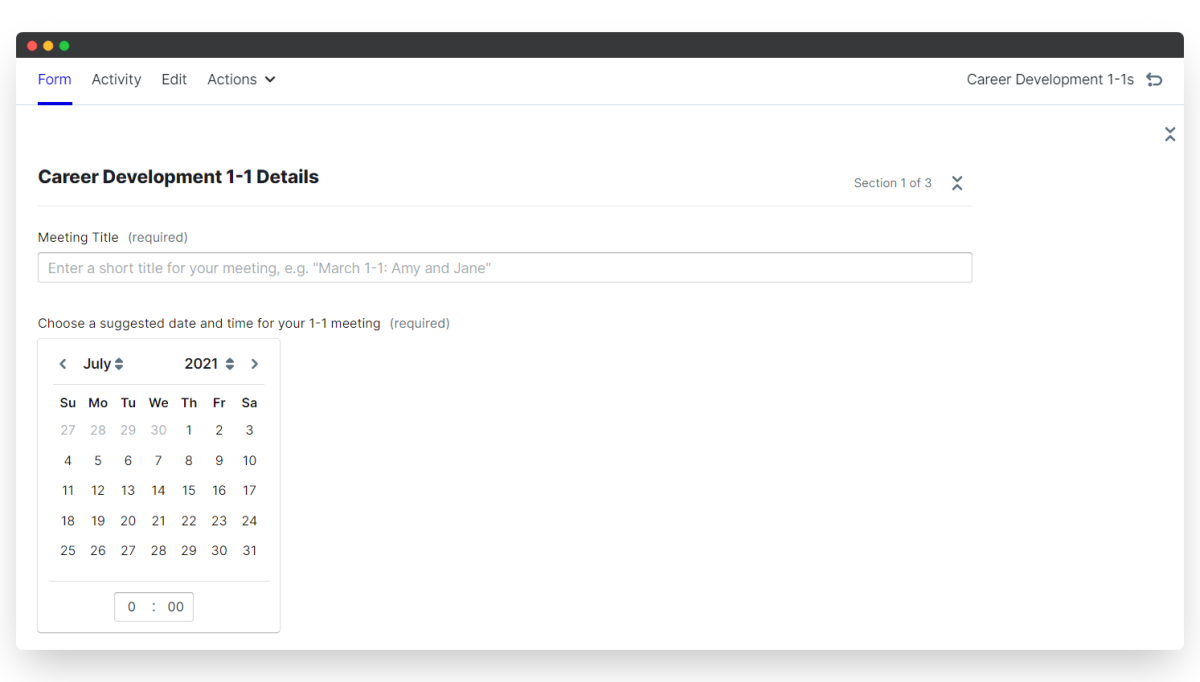
The specified manager/employee will be informed and then they have the option to accept or reject the request. Once confirmed, each participant will be informed of the agreed time and date.
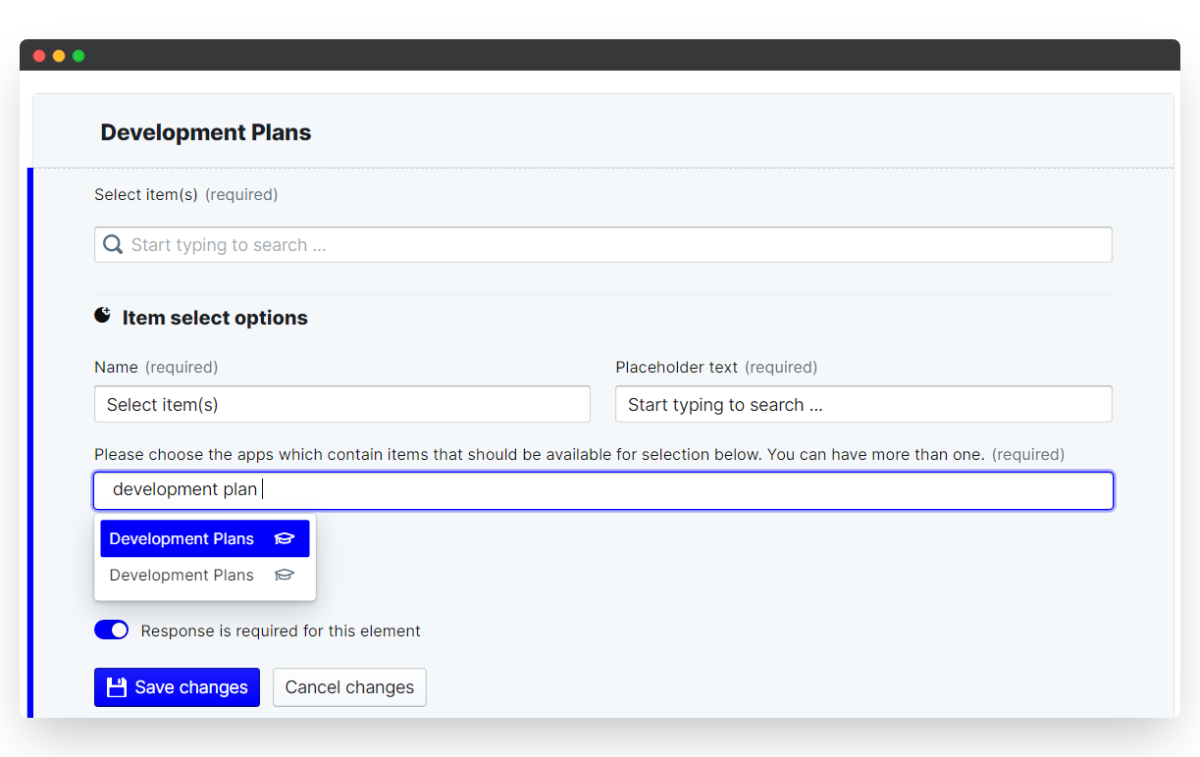
You may find it useful to link your development plan to the meeting request. In our example, we have created a new section specifically for this item. In the new section, we have added an Item select element, this can then be linked to the development plan app. By doing this, if there is a specific area of your development plan that you'd like to discuss, this can be then be incorporated into the talking points for your meeting.
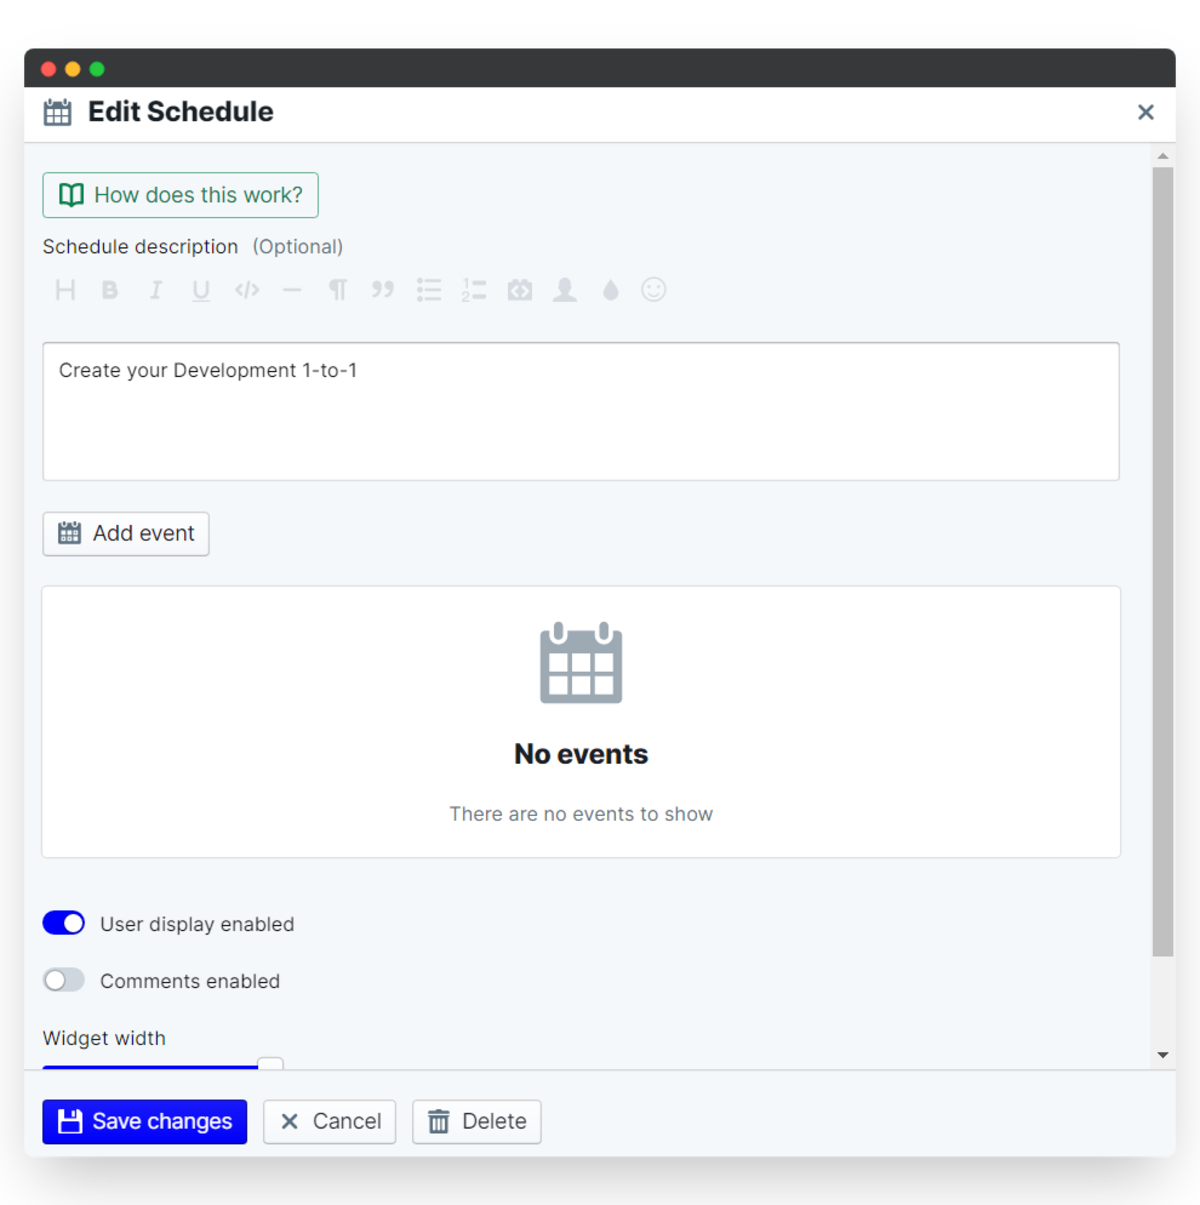
ii. Schedule recurring meetings
You can schedule recurring one-on-one meetings to be monthly, bi-weekly or whatever you need.
- To do this, from the Career Development One-on-Ones app menu, click Add... and then Schedule.
- In the box that appears at the top of your screen, click the pencil icon in the top right. From here you can enter more information about the recurring meeting.
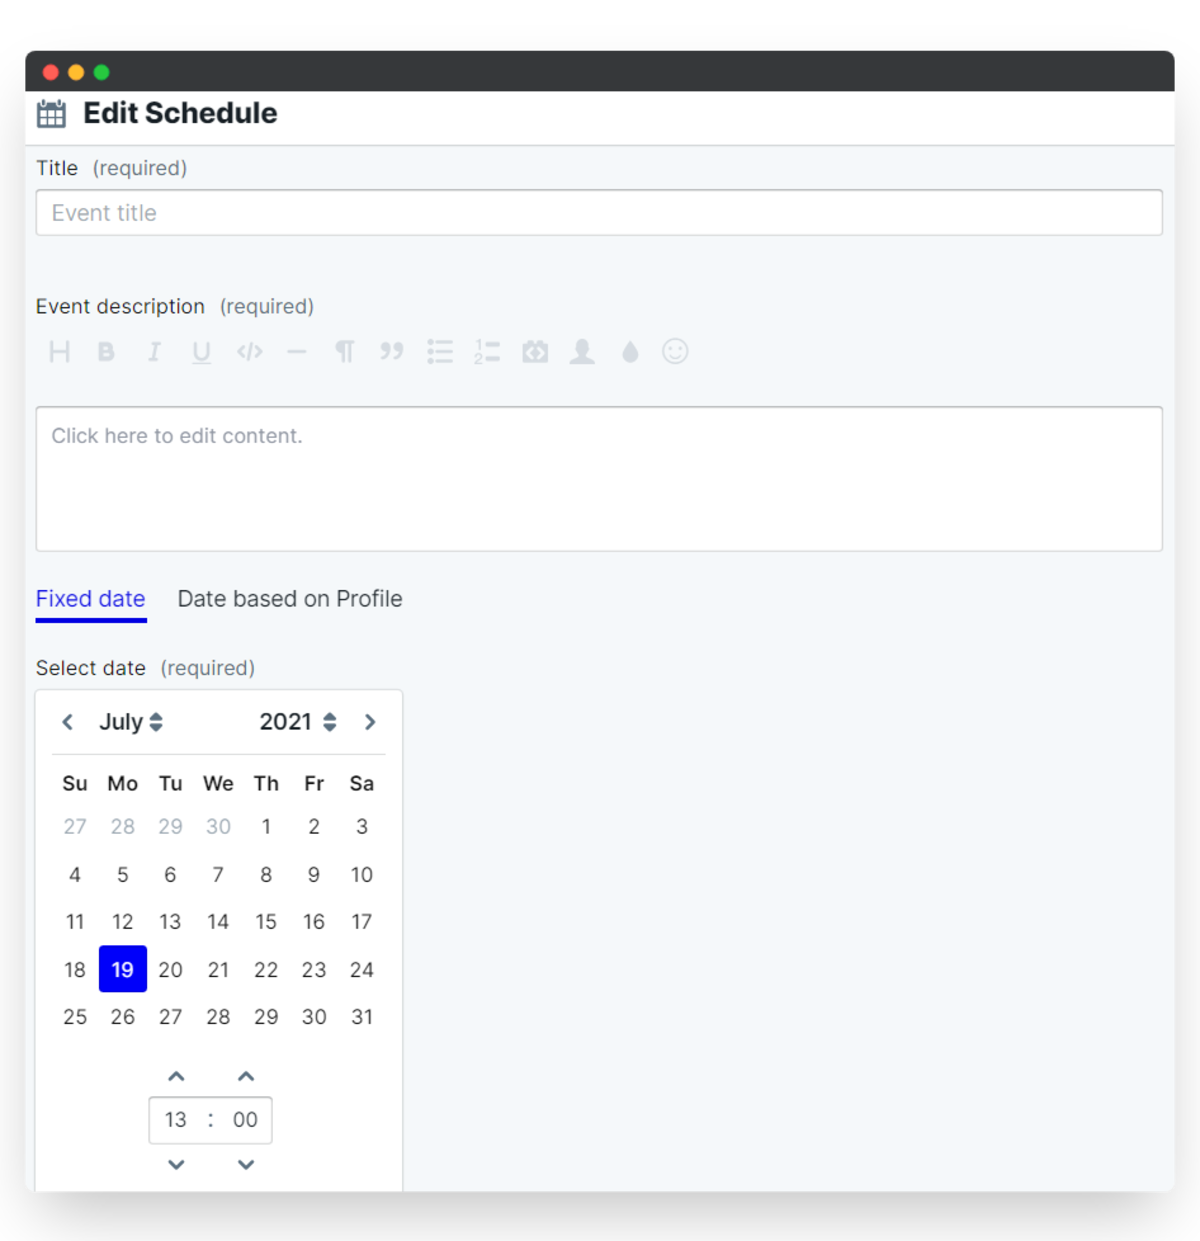
- Then select Add event and fill in more relevant information to help your employees understand what the meeting is for. You can then choose a date and time for your meeting to take place. REMEMBER that you can also set the date in the app itself, so this is more to schedule a general time to aim to conduct the meeting.
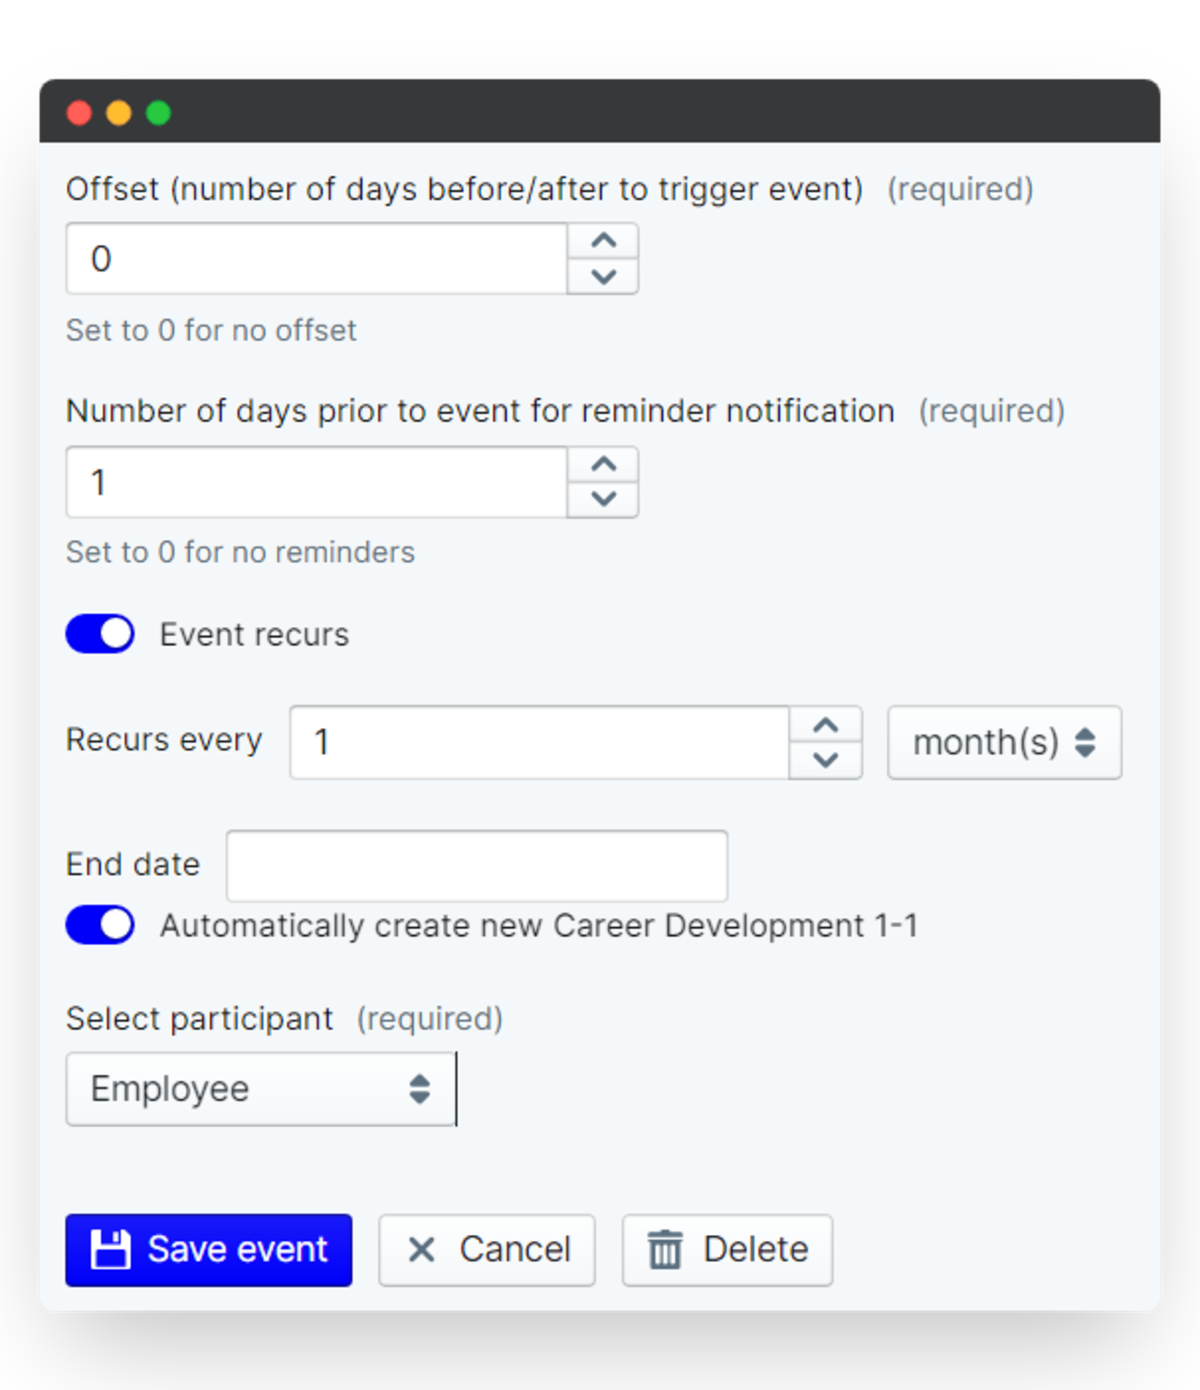
- You can then set how many days prior to the meeting to notify the participants and importantly, below ensure Event recurs is toggled on and select how often you would like to hold the meetings.
- To make life easier you can also toggle Automatically create new Career Development 1-1 to save you the hassle of creating a new meeting request yourself.
- Once you've done all of this and you're happy, be sure to click Save changes and then once again from the next screen.
Give yourself a pat on the back. You're now completely good to go and your team can start developing into the best team ever to set foot on this planet!
Next steps: Why not set up your custom development plan analytics and reports?
Data and information is valuable for every company. Learning and gathering an accumulative projection of how your workforce is approaching their development can provide terrific insights. They could make the difference in enabling your company to flourish as you continue to grow. PeopleGoal captures every single data point from your development plan app in the Data table so that you can construct custom reports and automated charts. Head over to our Reports building article to learn how to create reports and analytics tracking.
Having got your development plans saddled and prepared for the virtual wilderness, take a look at the other apps you can install from other workspaces. For example, since you have been guiding your employees to set targets and development goals, you might find it useful to take up some of the Performance apps. We'd recommend implementing SMART Goals that you can link directly to each individuals' development plans. You could also add the Company OKRs app to set out some company-wide objectives in tandem with their plans. This and more can be found in the App Store.
Don't have a PeopleGoal account yet? Book a demo to see our no-code HR workflow builder in action!


PeopleGoal Support Team
Account Management & Implementation Specialists


