
Support Center.
Get Started or Become a Pro. Browse our support articles to learn how to get the best out of PeopleGoal.
Manage Users
Account owners are responsible for adding and administering all user profiles on your PeopleGoal account. In your User menu you can invite colleagues to join the account; upload and import all employees; manage invitations and requests to join the account; and build employee database reports.
A "user" is any individual on your PeopleGoal account, whether that's an account owner, an employee or a team lead. Every user has their own personal profile which is attached to their email address, and they will use this email address to log in to your account. You can't have more than one email address on a PeopleGoal profile (but you can belong to more than one account, either on the same or different email address).
To open your user menu, hover over Account in the lefthand navbar, then select Users.
You'll see five tabs in this menu:
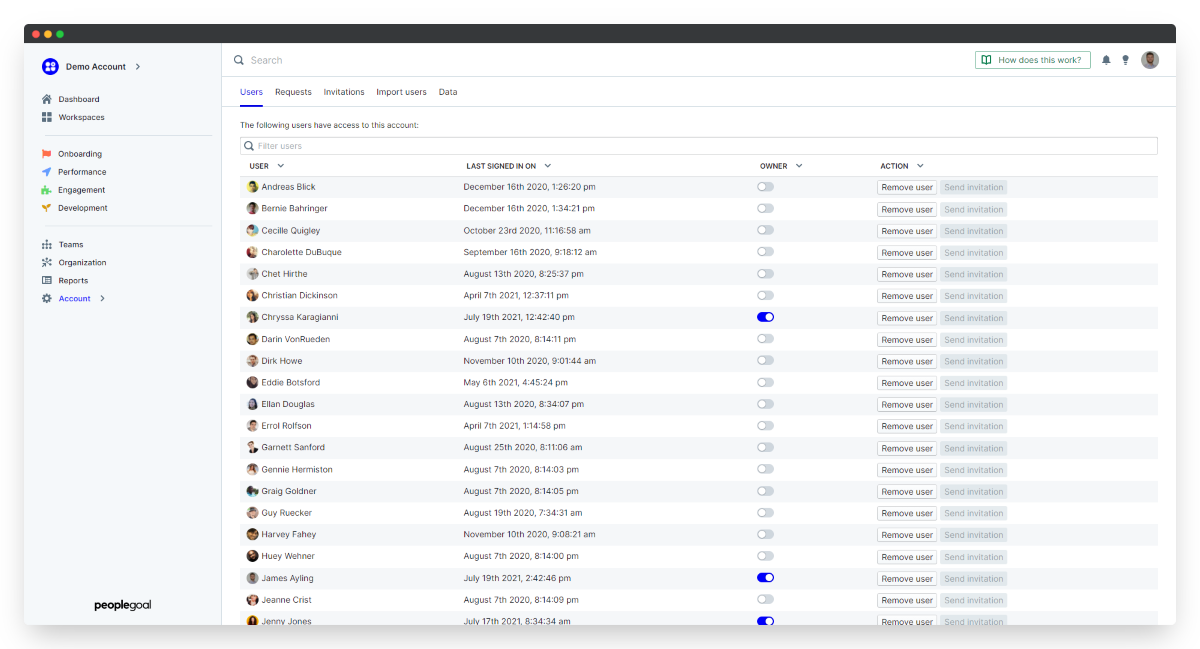
Users
This is your homepage for managing your account users, and your full list of all users. The list here is paginated, so scroll down to the bottom right and click Show all users to load your entire list. On this page you'll see the Last signed in date, and there are a few different actions you can complete.
Send user invitations
When you're ready to launch your account, you'll need to send out user invitations to all employees. Employees are not notified of any activity and are not able to access their PeopleGoal account until you've sent the invitations to them (exceptions may apply here for enterprise accounts using Single Sign-On).
- To notify an individual, click Send invitation next to their user record.
- Or, to notify everyone at once, scroll to the bottom of the user list and click Show all users. This brings all employees onto one page and selects them all for the invitations.
- Scroll back up to the top and click the blue Invite Users button.
Make someone an account owner
- Use the Filter to search for your colleague's name.
- In the "Owner" column, toggle on the switch.
- A confirmation box will appear. Click Promote to account owner to confirm.
- This employee will now have full owner access to all account settings and data.
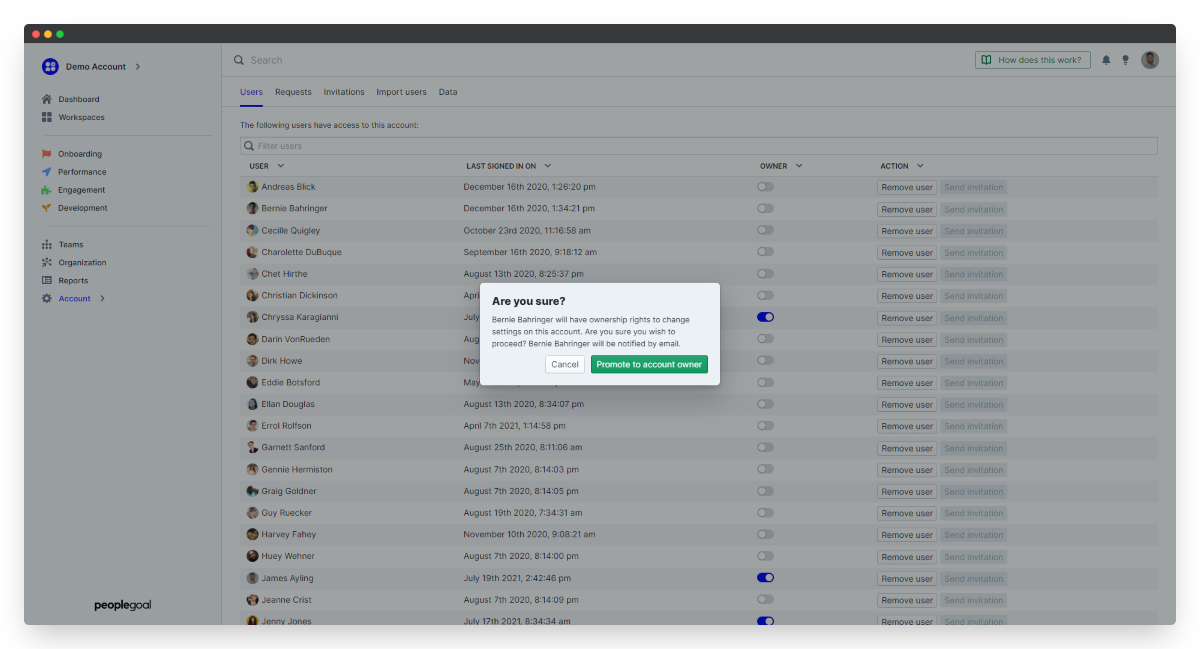
There's no limit to the number of account owners you can have at once, and no extra charges for owner profiles. However, account owners have access to the setttings and all sensitive employee data, so it's best to limit this access to your PeopleGoal superusers only.
Remove a profile
If an employee leaves your company, you can remove their PeopleGoal login details without deleting any of their in-app items.
- Click Remove user next to the employee record.
- This user will no longer be able to access or sign in to their PeopleGoal account.
- Any items they created in the apps will still be active (e.g. feedback given to colleagues, manager assessments on reviews).
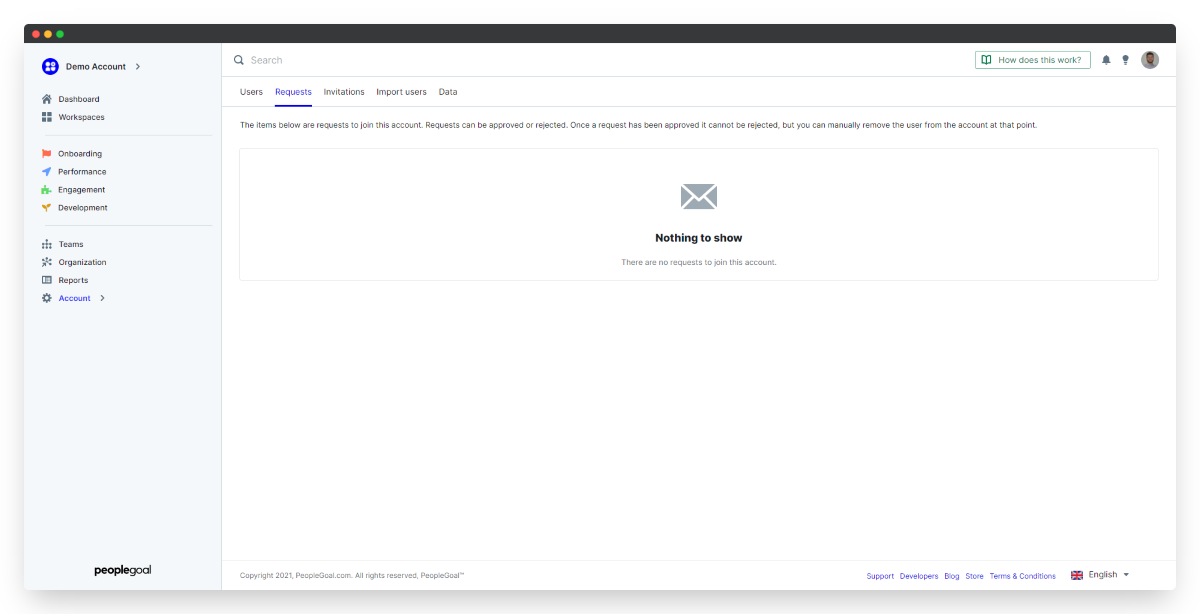
Requests
The Requests menu contains a list of all of the requests to join your PeopleGoal account. Anyone can request to join an account by searching for its subdomain, so all requests need to be approved by an account owner.
See how to request to join an account in our Create an Account section.
- When someone requests to join your account, all account owners will be notified in-app and by email.
- Click the link or select the Requests tab in your user menu.
- To view the email address for any requests, click the requestor name and their profile will open. Click back to the Requests page.
- In the Action column, select to Approve or Reject this request. If approved, your colleague will be emailed a link to set their password and sign in.
Invitations
Employees are not notified of any activity and are not able to access their PeopleGoal account until you've sent the invitations to them (exceptions may apply here for enterprise accounts using Single Sign-On). It's easier to upload all of your user details so that you capture the data for your custom profile fields, but you can also quickly invite anyone else to join with just their email address.
Invite a colleague by email
- Open the Invitations tab on your User menu.
- Type the email in the Send new invitation to email address field.
- Separate multiple emails with a comma.
- Click Send invitation to invite your colleage(s).
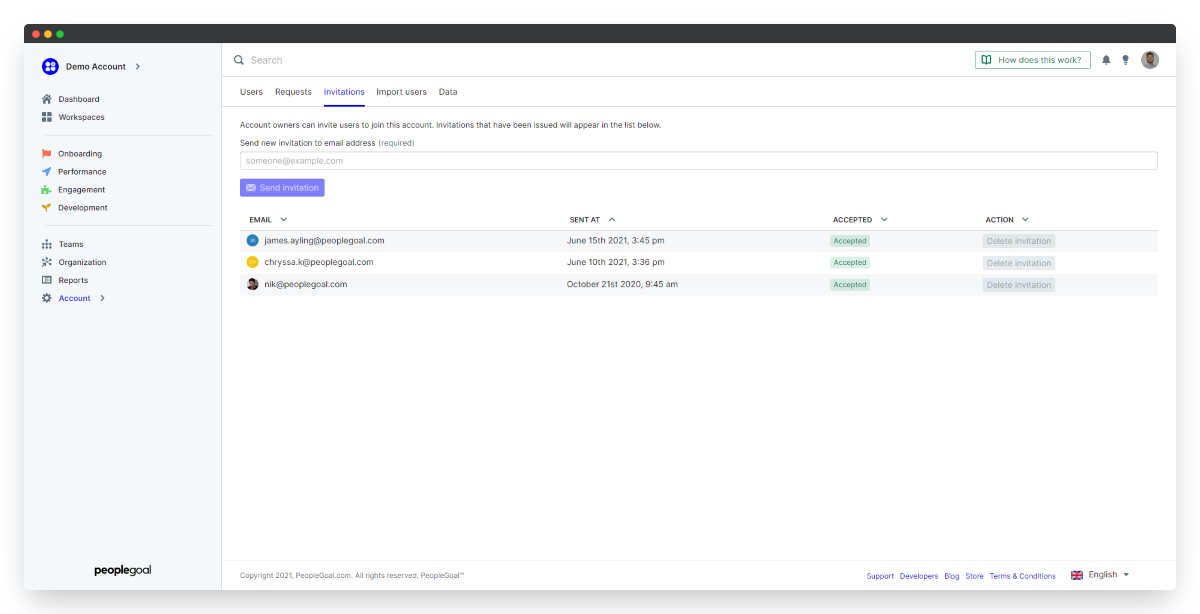
Re-send invitations
There may be times when you want to re-send an invitation to someone - if they haven't accepted the initial invitation, or didn't receive it. All outgoing invitations will come from contact@peoplegoal.com, so first check your inbox to make sure you didn't miss the first invite.
- To re-send an invitation, click the Invitations tab on your user menu.
- If you have > 25 invitations sent out, click Show all invitations in the bottom right corner to display all.
- Find the invitation you want to re-send (CTRL/CMD + F to search for the email address) and click Delete invitation. You will only be able to do this if it's still pending, not accepted.
- Then invite your colleague by email using the steps above.
- The new invitation will still be attached to the same email address, so any custom profile data you may have added in your user import will still be attached to this profile. All you're doing here is re-issuing the invitation to join the account for this profile.
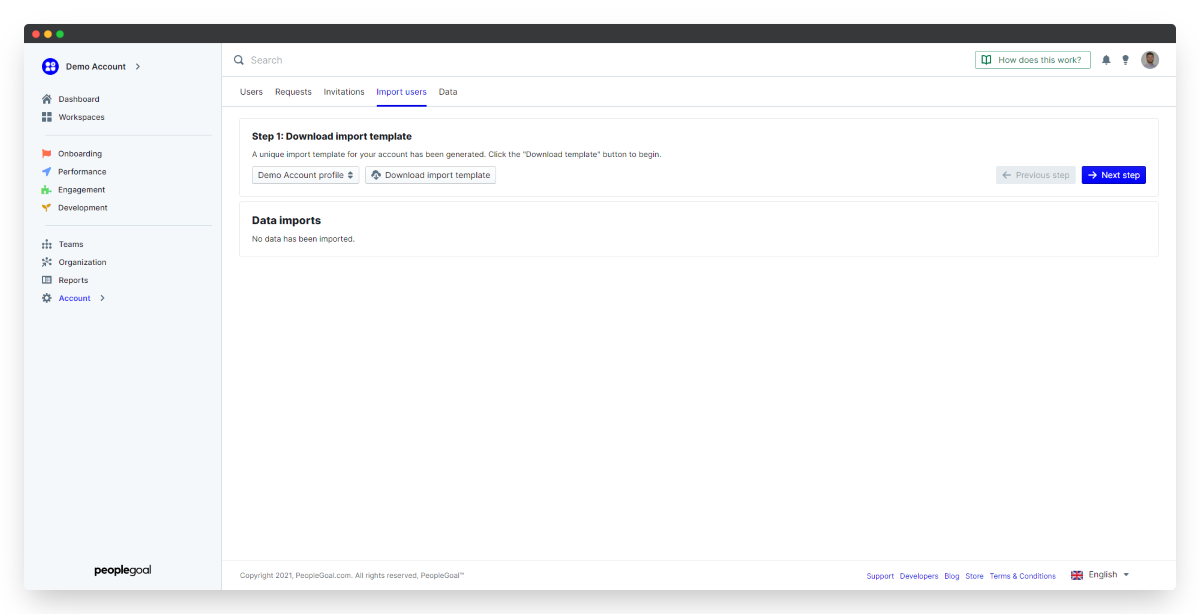
Import users
The User Import Template is the easiest and quickest way to add all employees to your account. Because you can define completely custom Profile templates, your user import template will then be unique to your account and you can fill out all employee details in one upload.
- Click the Import Users tab on your User menu.
- In Step 1, choose the profile template you want to populate (you may have more than one profile template!)
- Then click Download import template, and click Next step.
- An XLS file will be saved to your local drive to populate and upload.
- It's very important not to change any data in the first row of this template or reorder any of your template columns! The first row contains all of the profile field IDs, and if these are removed the system can't match your employee data to the correct field.
- Once you've populated your template in Excel, on Step 2 click Next step.
- In Step 3, click Select import data and choose your template to upload. Then click Upload data.
You can see the status of your upload in the Data imports menu below. Click the import to open up the details, and you'll be able to see any errors on the file.
Relationships and Teams
Once you've imported your users, you can then go on to add their Relationships and their Teams. These are separate models from the employee profile.
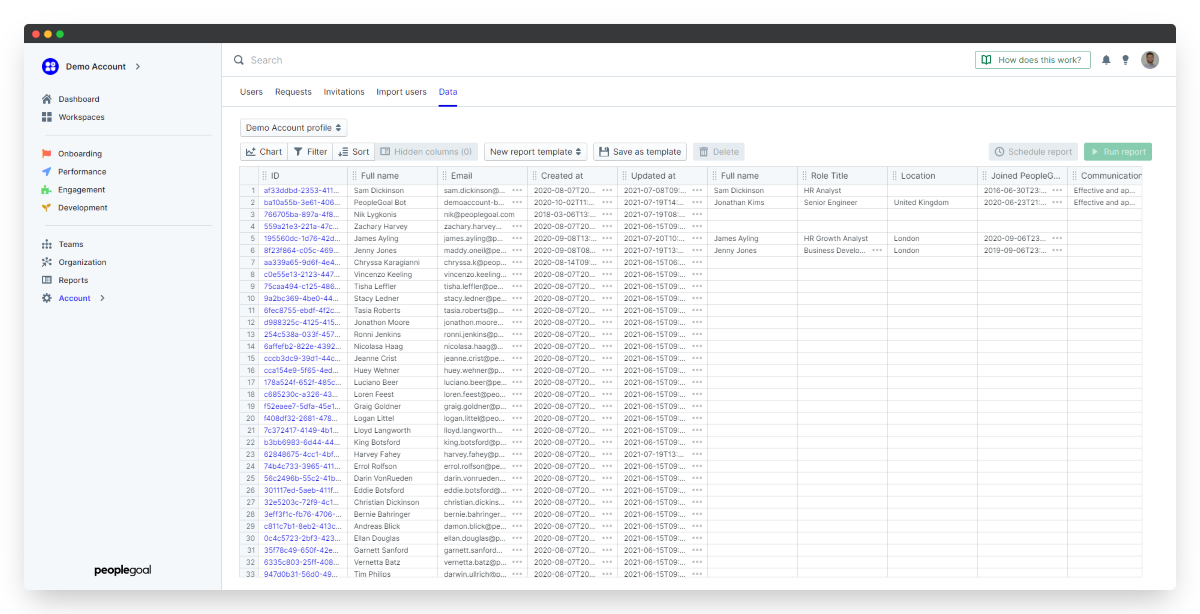
Data
The Data tab is just like the Data view you have in your PeopleGoal apps. It contains a table with every single element from your employee profiles. You can use this table to build custom reports and charts, run data exports and schedule regularly recurring reports to key stakeholders.


PeopleGoal Support Team
Account Management & Implementation Specialists


